This guide focuses only on the new changes for the VROC 26.2 VC1 release; it is not a complete user manual. For existing features that have not changed (for example, installing the VROC Windows* GUI application, or installing the Windows* OS behind a VROC volume), refer to the prior documentation released for Intel® VROC 9.4 PV. Full documentation — including the VROC Windows* Technical Product Specification, User Guide, and CLI User Guide — will be available by the VROC 26.2 PV release milestone.
The target audience for this document is validation partners of Graid (system OEMs) that are testing new features in VROC™ by Graid Technology Inc. for the upcoming VROC 26.2 PV release in 26H2.
VROC 26.2 VC1 validation partners should focus validation efforts on the following new features:
UEFI license installation.
Upgrading from Intel® VROC to VROC™ by Graid Technology Inc. with "Normal" or "Healthy" VROC volumes.
Feedback on the look and feel of the new UI in the Windows* and UEFI HII environments:
The VROC™ by Graid Technology Inc. Windows* GUI remains functionally unchanged from the Intel® VROC 9.4 PV release, besides the feature deprecations detailed in the VROC 26.2 VC1 Release Notes. Several visual and branding changes have been made in the VROC 26.2 VC1 Windows* GUI.
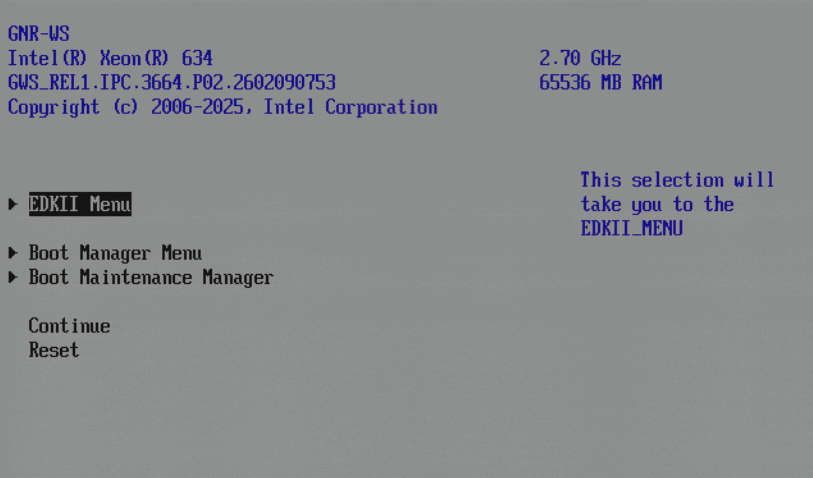
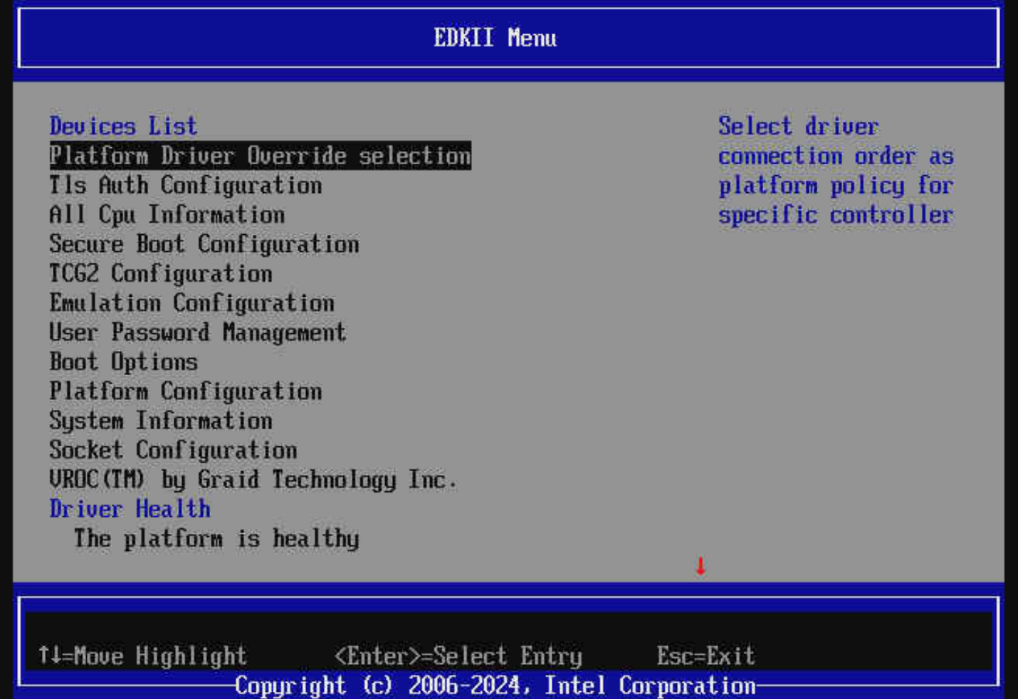
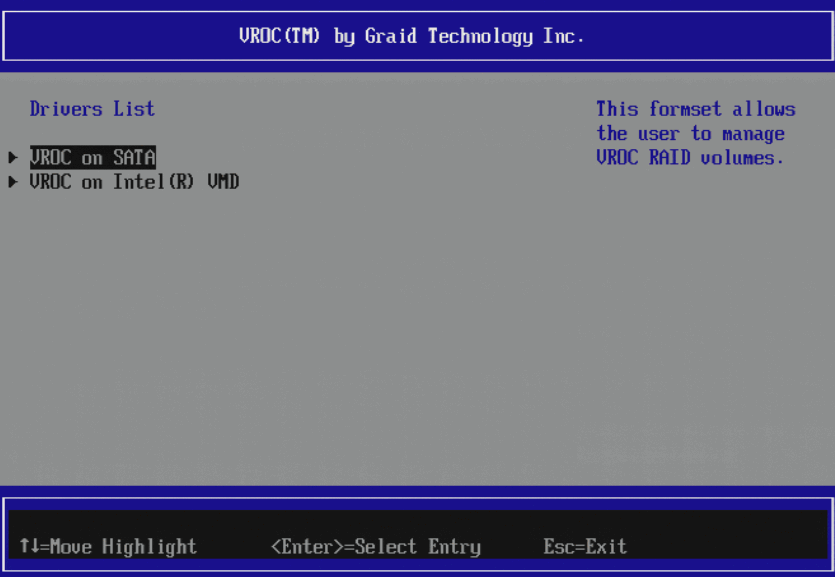
The VROC UEFI HII menu is now accessed in a slightly different way, which is detailed in this document.
The VROC™ by Graid Technology Inc. product is not backwards compatible with the Intel® VROC product. All applicable components — including PreOS and Windows* OS drivers, tools, and utilities — must be upgraded concurrently to the VROC™ by Graid Technology Inc. versions. After the upgrade is complete, use only the VROC Windows* CLI tool and EFI shell tools that come packaged with the VROC™ by Graid Technology Inc. release.
Notice of feature deprecation
Some Intel® VROC features have been deprecated in the VROC™ by Graid Technology Inc. 26.2 release. Refer to the Deprecated VROC Features section of the release notes before upgrading.
To ensure the integrity of your data and the stability of the running system, the upgrade procedure below must be followed exactly.
Intel® VROC release version 9.0 PV or newer must be installed in the PreOS and Windows* environments. The Windows* OS driver must be the same version as, or newer than, the PreOS driver.
Obtain a UEFI BIOS image with the latest VROC™ by Graid Technology Inc. PreOS UEFI drivers integrated.
All Intel® VROC RAID volumes must be in a "Normal" healthy (synced) state prior to upgrading.
The target platform must be Granite Rapids based (GNR-SP/AP, GNR-W, GNR-D).
Upgrade the Windows* Intel® VROC components to the VROC™ by Graid Technology Inc. versions.
Reboot the platform and enter the UEFI BIOS. Refer to the platform manufacturer's documentation to determine which key to press during POST. On Intel® CRB systems, press F2 during POST.
Upgrade the system UEFI BIOS to the latest image that includes the VROC™ by Graid Technology Inc. PreOS UEFI drivers. Refer to the platform manufacturer's documentation for exact instructions.
If the BIOS update was performed while the platform was powered on, reboot the platform. Verify that the BIOS update completed successfully. The platform is now upgraded to VROC™ by Graid Technology Inc.
VROC (SATA RAID) allows the creation of RAID volumes through the UEFI HII interface, which is part of the UEFI driver package included with the platform BIOS. The VROC (SATA RAID) UEFI HII can be accessed via the BIOS Setup environment.
The steps below were created using an Intel® Customer Reference Board (CRB). Refer to the instructions supplied by your platform BIOS vendor, as those instructions may differ.
Immediately following POST, select the option that allows access to the BIOS setup menu. This example uses F2.
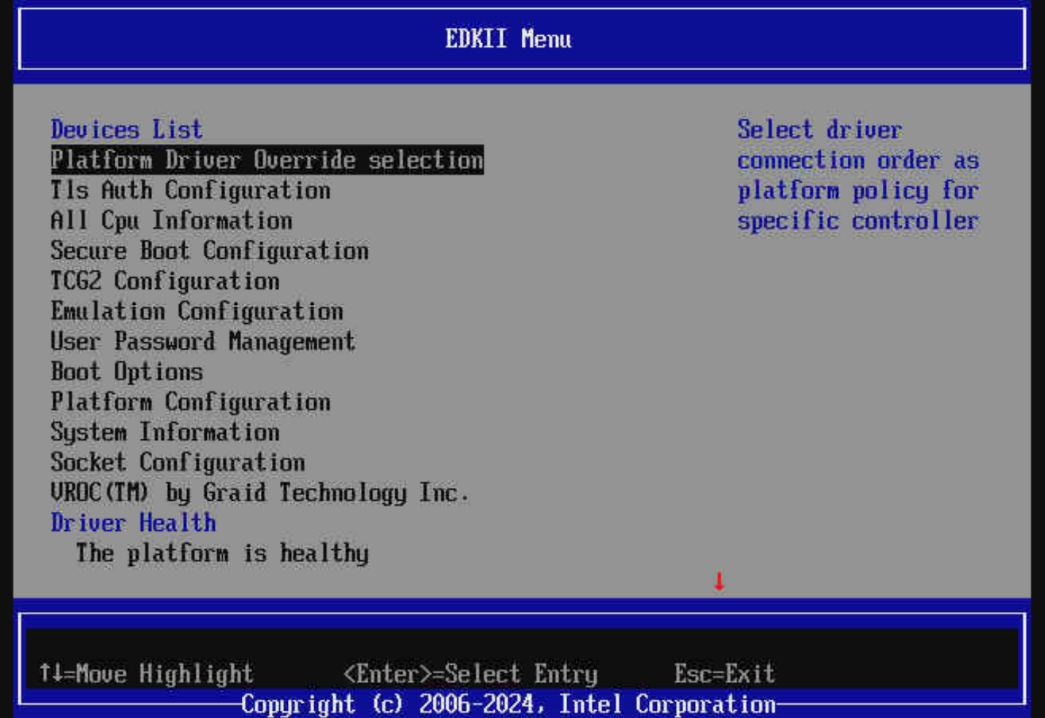
Using the arrow keys, highlight EDKII Menu and press Enter.
Within the EDKII Menu, navigate to Platform Configuration and press Enter.
Within Platform Configuration, navigate to PCH-IO Configuration, then find SATA and RST Configuration and press Enter.
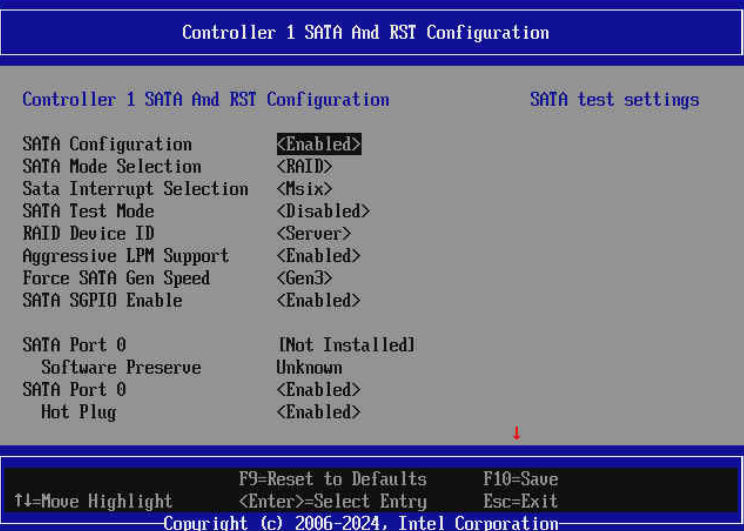
Select Controller 1 SATA and RST Configuration and press Enter.
Navigate to SATA Mode Selection. By default, it is set to AHCI. To enable the controller for RAID mode, press Enter to open the selection menu, use the arrow keys to select RAID, and press Enter. A notification in the bottom right-hand corner indicates that the configuration has changed.
Enabling SATA RAID
A pop-up window asks to confirm "Save configuration changes and exit?" Press Y to confirm and reboot the system.
Press F2 again after POST to enter the BIOS.
Navigate to EDKII Menu and press Enter.
A new UEFI menu option now appears. Navigate to VROC™ by Graid Technology Inc. and press Enter.
To view the VROC (SATA RAID) HII, navigate to VROC on SATA and press Enter.
Note
Refer to the instructions provided by your platform BIOS vendor, because those instructions will most likely differ from these.
These instructions explain how to enable Intel® VMD on an Intel® Customer Reference Board (CRB).
Immediately following POST, select the option that allows access to the BIOS setup menu. This example uses F2.
For the Intel® CRB reference BIOS, use the arrow keys to highlight the EDKII Menu and press Enter.
Navigate to Socket Configuration and press Enter.
Navigate to IIO Configuration and press Enter.
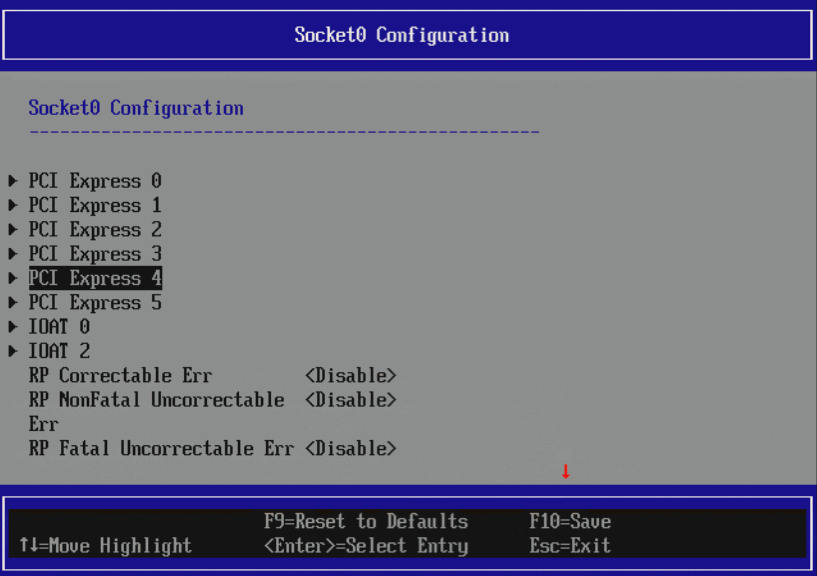
Navigate to Socket 0 or Socket 1 Configuration and press Enter.
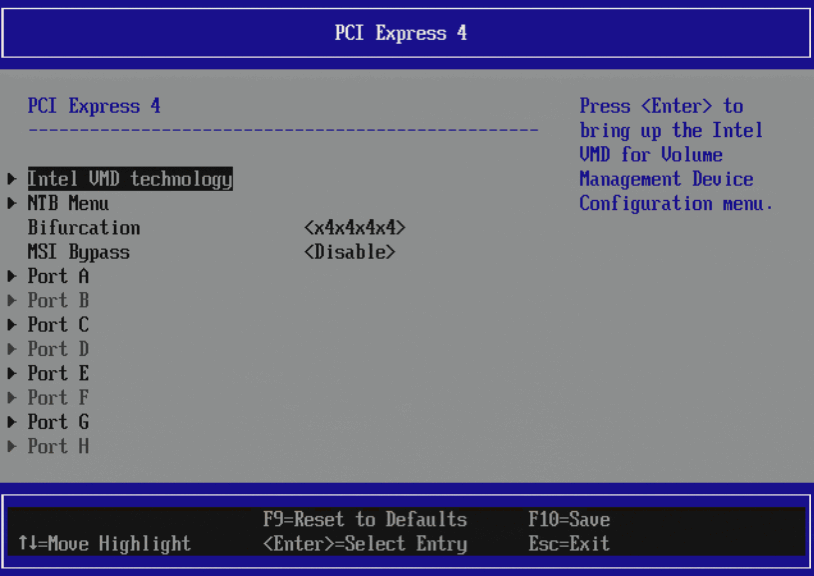
Select the desired PCI Express # to enable or disable Intel® VMD according to the hardware configuration being used.
Socket # Configuration
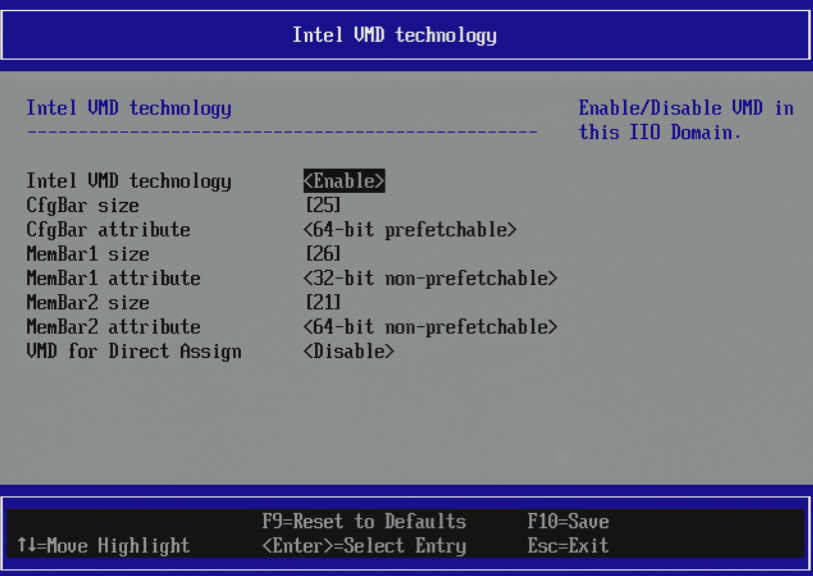
Select Intel VMD technology, press Enter, and set it to Enabled.
PCI Express # Intel VMD enabling
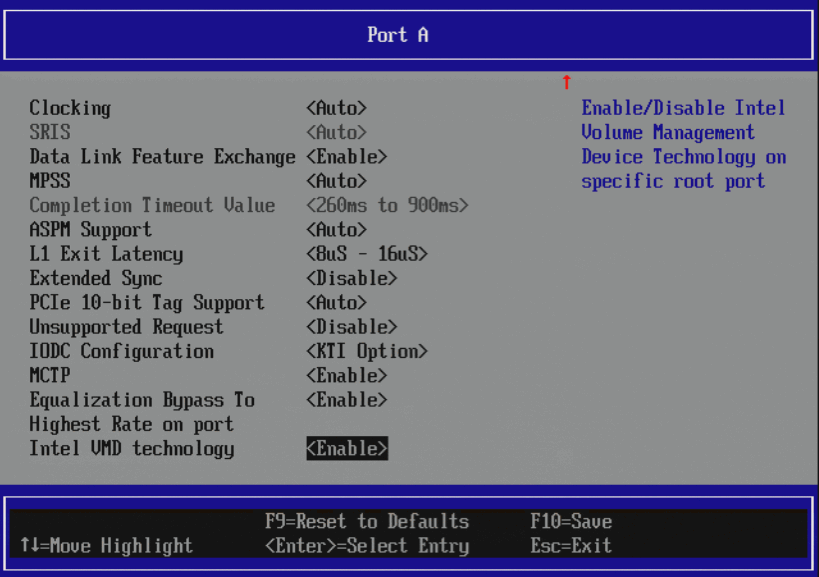
Press Esc to go back one menu, then select the desired ports for enabling Intel® VMD for this PCI Express lane. For example, enter the Port A menu, scroll to the very bottom, and set Intel VMD technology to Enabled. Repeat for each port to be enabled for VMD behind this lane.
PCI Express # settingsPort X Intel VMD enabling
Repeat steps 6 through 8 for each PCI Express # to be enabled.
Note
Refer to the instructions provided by your platform BIOS vendor, because those instructions will most likely differ from these.
The following procedure demonstrates how to load the VROC UEFI license key onto an Intel® CRB system. Refer to your platform OEM for instructions specific to your platform.
There are two methods to load the VROC UEFI license onto the platform:
Using the VROC UEFI HII menu.
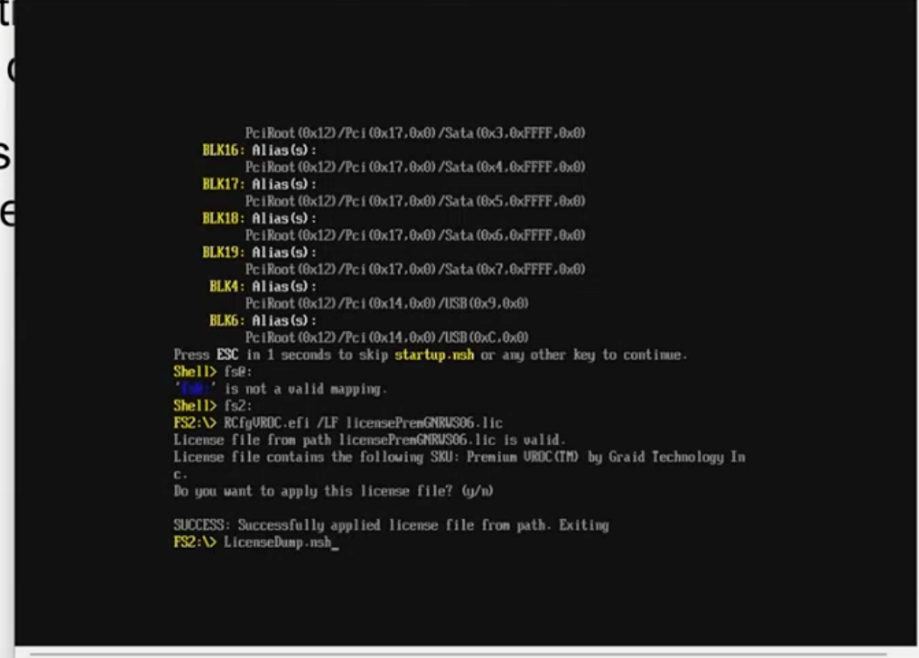
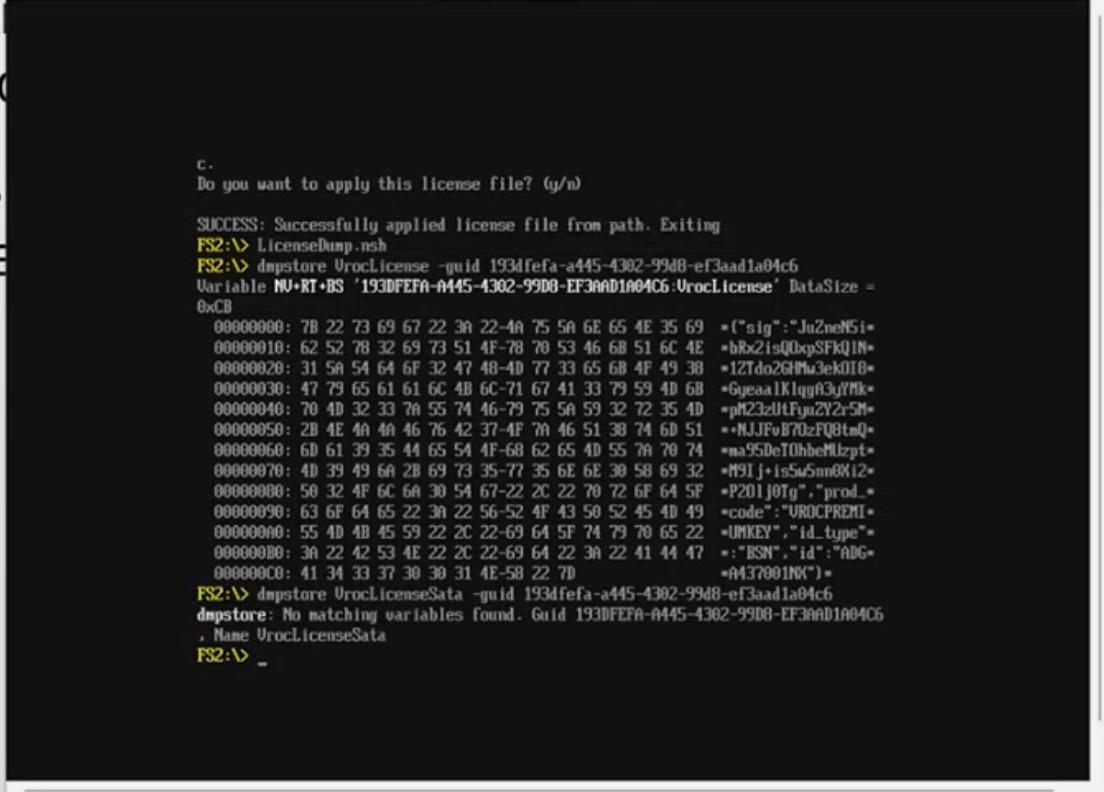
Using the VROC RCFG EFI shell tool.
This procedure assumes:
Intel® VMD is enabled in the platform UEFI BIOS.
A USB key is attached to the system, containing the desired *.lic VROC UEFI license file to be loaded.
Immediately following POST, press the key that invokes the UEFI BIOS setup menu. On Intel® CRB systems, this key is F2.
Navigate to the EDKII Menu option and press Enter.
UEFI BIOS home page
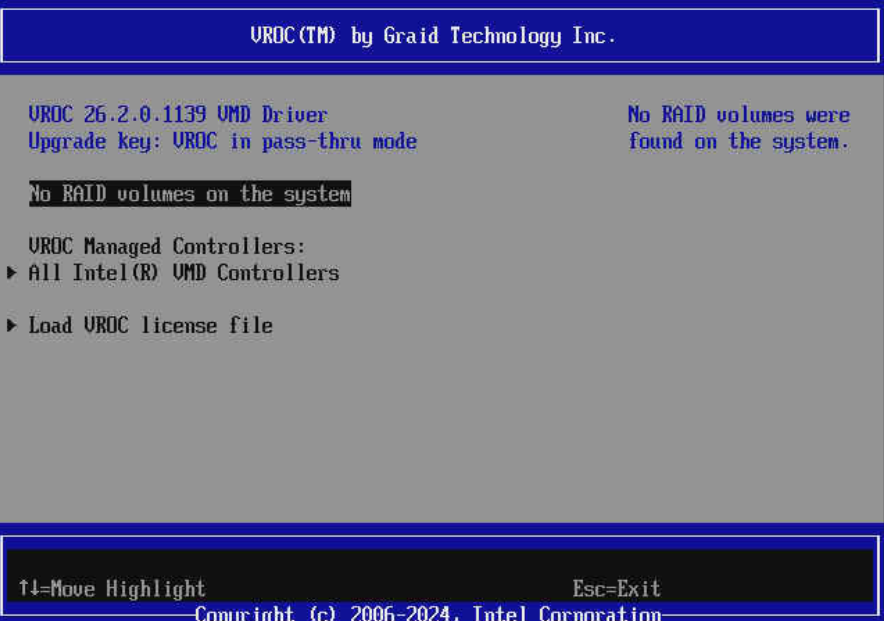
Navigate to the option VROC™ by Graid Technology Inc. and press Enter, then select VROC on Intel® VMD.
EDKII MenuVROC™ by Graid Technology Inc. menuVROC (VMD NVMe RAID) HII menu
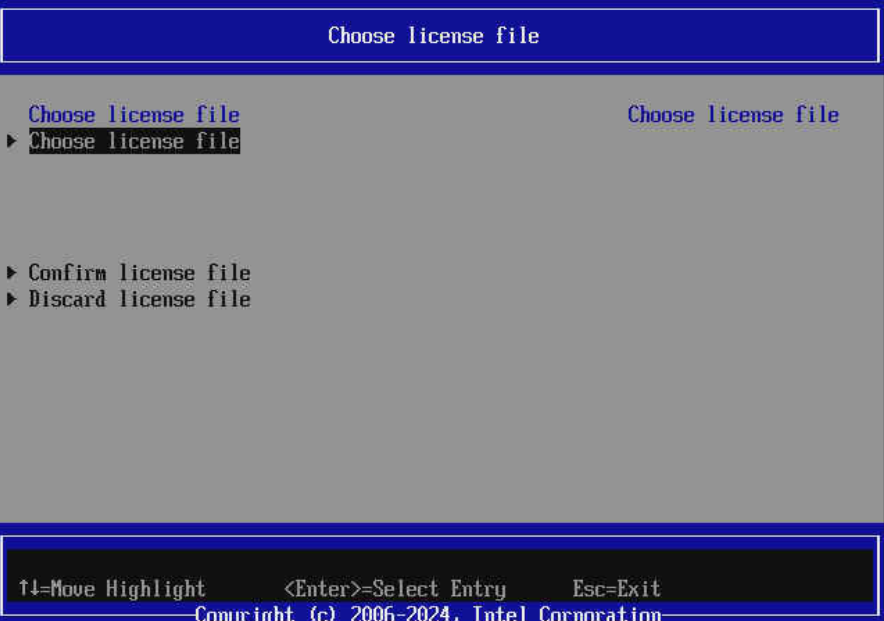
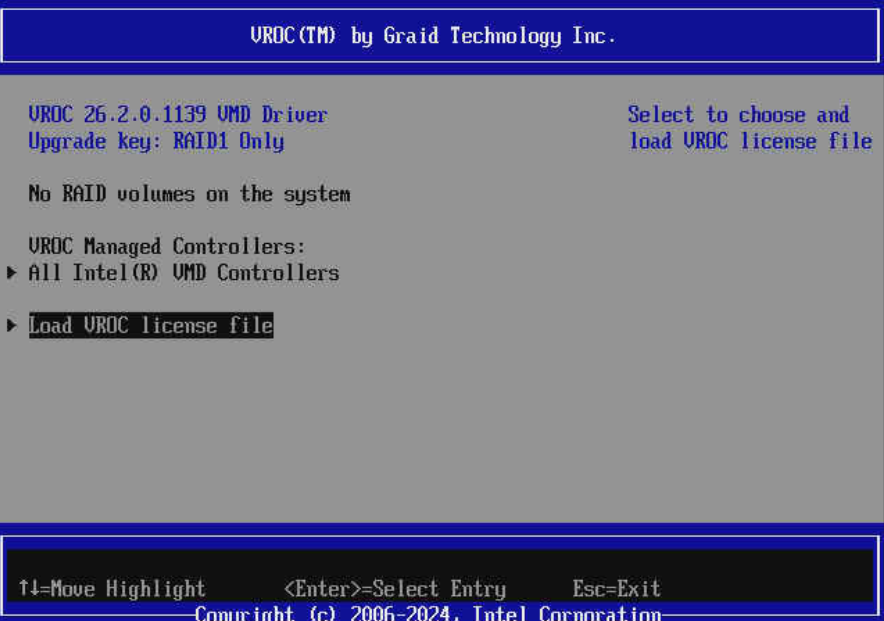
Navigate to the option Load VROC license file and press Enter.
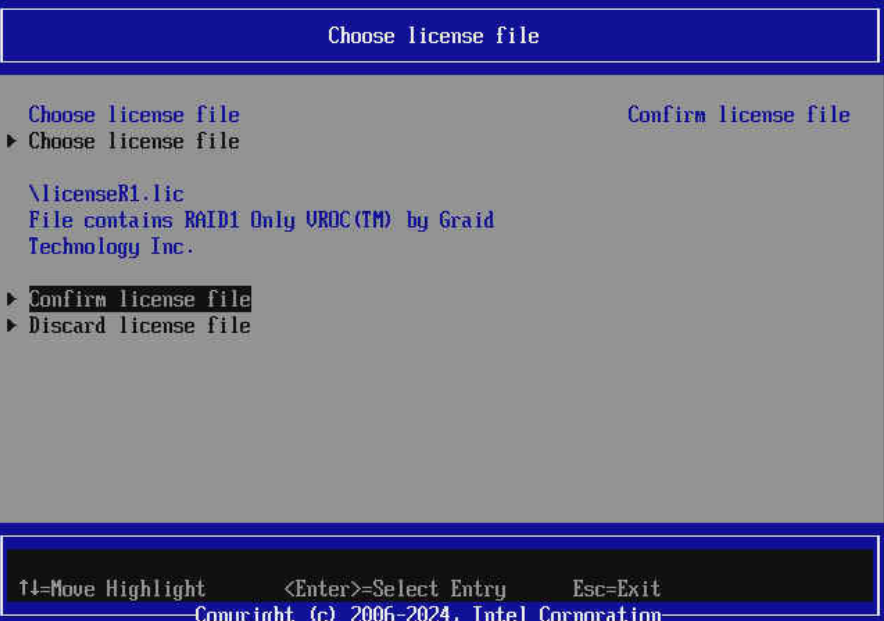
Choose license file
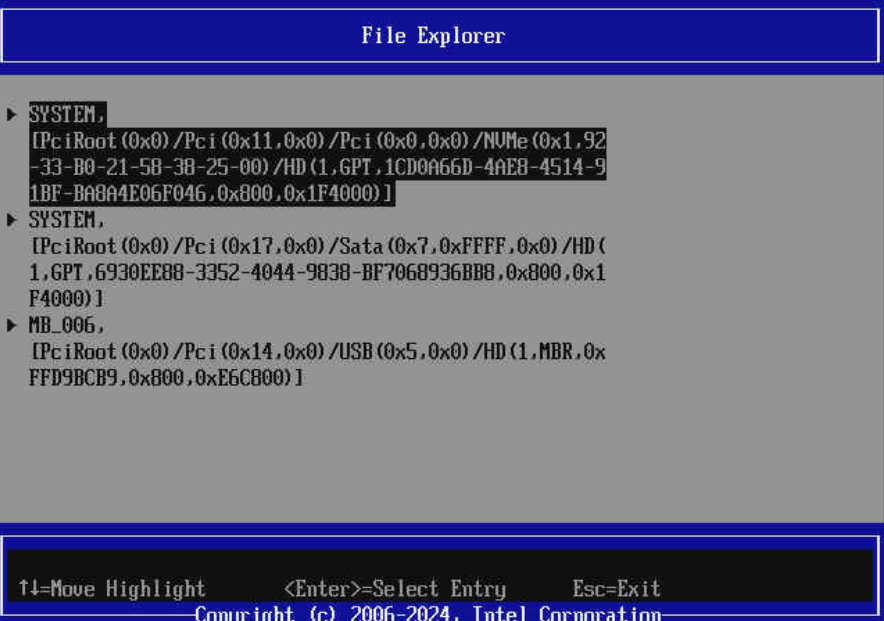
The EFI file explorer menu appears, displaying a list of detected file systems. Navigate to the file system of the USB drive that contains the *.lic file and press Enter. The file system handle contains the string "USB".
File explorer
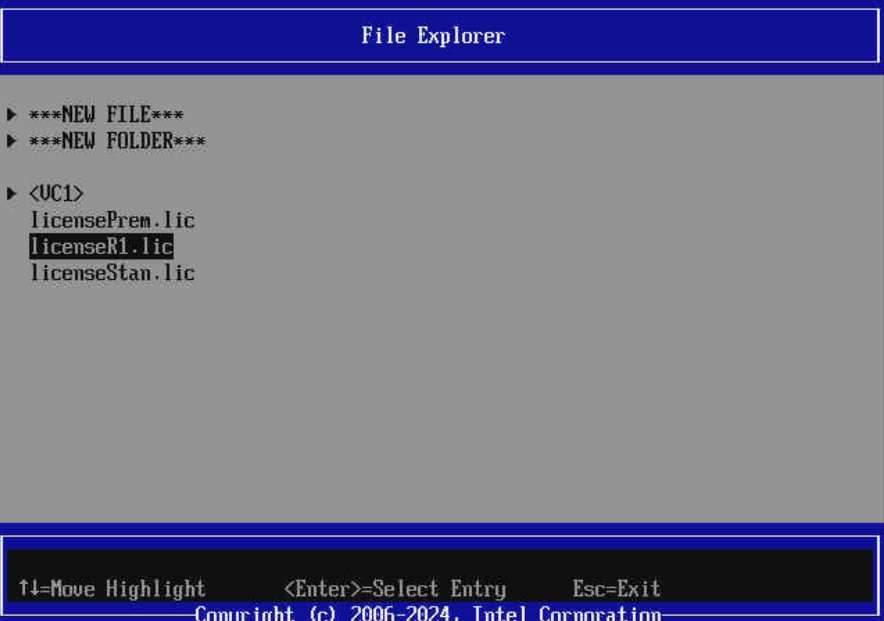
Navigate to the *.lic file and press Enter to verify your selection.
In 26.2 VC1, the license may not load immediately, and the Upgrade key will still indicate VROC in pass-thru mode in the VROC (VMD NVMe RAID) UEFI HII after following these instructions. Reboot the platform at this point and re-enter the VROC (VMD NVMe RAID) UEFI HII menu; the loaded upgrade key will then be reflected in the HII menu.
In 26.2 VC1, the license may not load immediately, and the Upgrade key will still indicate VROC in pass-thru mode in the VROC (VMD NVMe RAID) UEFI HII after following these instructions. Reboot the platform at this point and re-enter the VROC (VMD NVMe RAID) UEFI HII menu; the loaded upgrade key will then be reflected in the HII menu.
The following instructions create a RAID volume using the VROC UEFI HII. This procedure should only be used for a newly built system or for reinstallation of the operating system. After the OS is installed, it is advised to use the VROC GUI within the Windows* operating system to create data RAID volumes.
This procedure assumes:
You know how to enter the appropriate platform BIOS setup menus.
Intel® VMD or SATA RAID functionality has been enabled.
The appropriate VROC RAID Upgrade Key has been installed.
The appropriate number of matching NVMe or SATA drives have been plugged into the enabled Intel® VMD or SATA controller.
Enter the BIOS configuration setup menu to access the VROC UEFI HII interface.
Navigate to and select VROC™ by Graid Technology Inc. and press Enter. Then select either VROC on SATA or VROC on Intel® VMD and press Enter.
EDKII MenuVROC™ by Graid Technology Inc. menu
For VROC (VMD NVMe RAID): navigate to All Intel® VMD Controllers, then select Create RAID Volume and press Enter. For VROC (SATA RAID): select Create RAID Volume and press Enter.
To specify a volume name, press Enter on the default name that is populated (for example, VrocVolume01), type a volume name, and press Enter.
Note
The volume name must be unique. Normally, VROC does not allow a new volume to be created with a name already used by another volume in the same system. However, if a volume with the same name is migrated from a different platform, two volumes with the same name can result. This situation is not supported and may cause issues.
Select the RAID level by pressing Enter and using the arrow keys to scroll through the available options. Highlight the desired RAID level and press Enter to select it.
(Optional) This step applies only to RAID volumes that have drives connected to more than one Intel® VMD controller. Only data volumes are supported in this configuration; boot volumes must have all drives connected to the same VMD controller. To enable volumes that span multiple Intel® VMD controllers, use the arrow keys to highlight the < > bracket next to Enable RAID Spanned over VMD Controllers and press Enter. Navigate the cursor to the X and press Enter to enable volume spanning.
Select the drives one by one by highlighting the < > bracket on the line next to each drive's port number. Press Enter to open the selection menu, navigate to the X, and press Enter to include that drive in the array.
Repeat step 7 for each drive required in this array.
Select the strip size using the arrow keys and pressing Enter to open the options menu. Select the desired strip size and press Enter to save the value.
Note
RAID 1 is set at a default strip size value of 128 KB and cannot be modified.
Select the volume capacity and press Enter. The default value is the maximum capacity available with the drives selected. The value is calculated in bytes; for example, a 700 GB drive uses the calculation 700 * 1024 = 716800.
Note
Unless specifically changed, the default volume capacity is 95% of the available space, to support disk coercion.
Navigate to Create Volume and press Enter.
You are returned to the VROC™ by Graid Technology on Intel® VMD screen, and the newly created RAID volume is listed just below the text VROC All Intel® VMD Controllers. Other drives or unused portions of drives are listed under Non-RAID Physical Disks and may be used to create additional RAID volumes.
To exit the user interface, press Esc. Press Esc again; the message "Changes have not saved. Save changes and exit? Press 'Y' to save and exit, 'N' to discard and exit, 'ESC' to cancel" appears. Press Y to save and exit.
Note
Not saving at this time discards the changes made, including all configuration settings for the RAID array.
To save and reboot to begin operating system installation, press Esc to return to the Main Menu. Navigate to Reset and press Enter to reboot the system back to the boot menu.
Note
For RAID 1, 5, and 10, the system does not automatically initialize these volumes via the UEFI. Initialization must be done manually via the VROC Windows* GUI once the operating system has been installed.



 VROC™ by Graid Technology Inc. New Feature Validation User Guide for Windows*