VROC Support Ticket Submission Guide
New User Account Sign Up
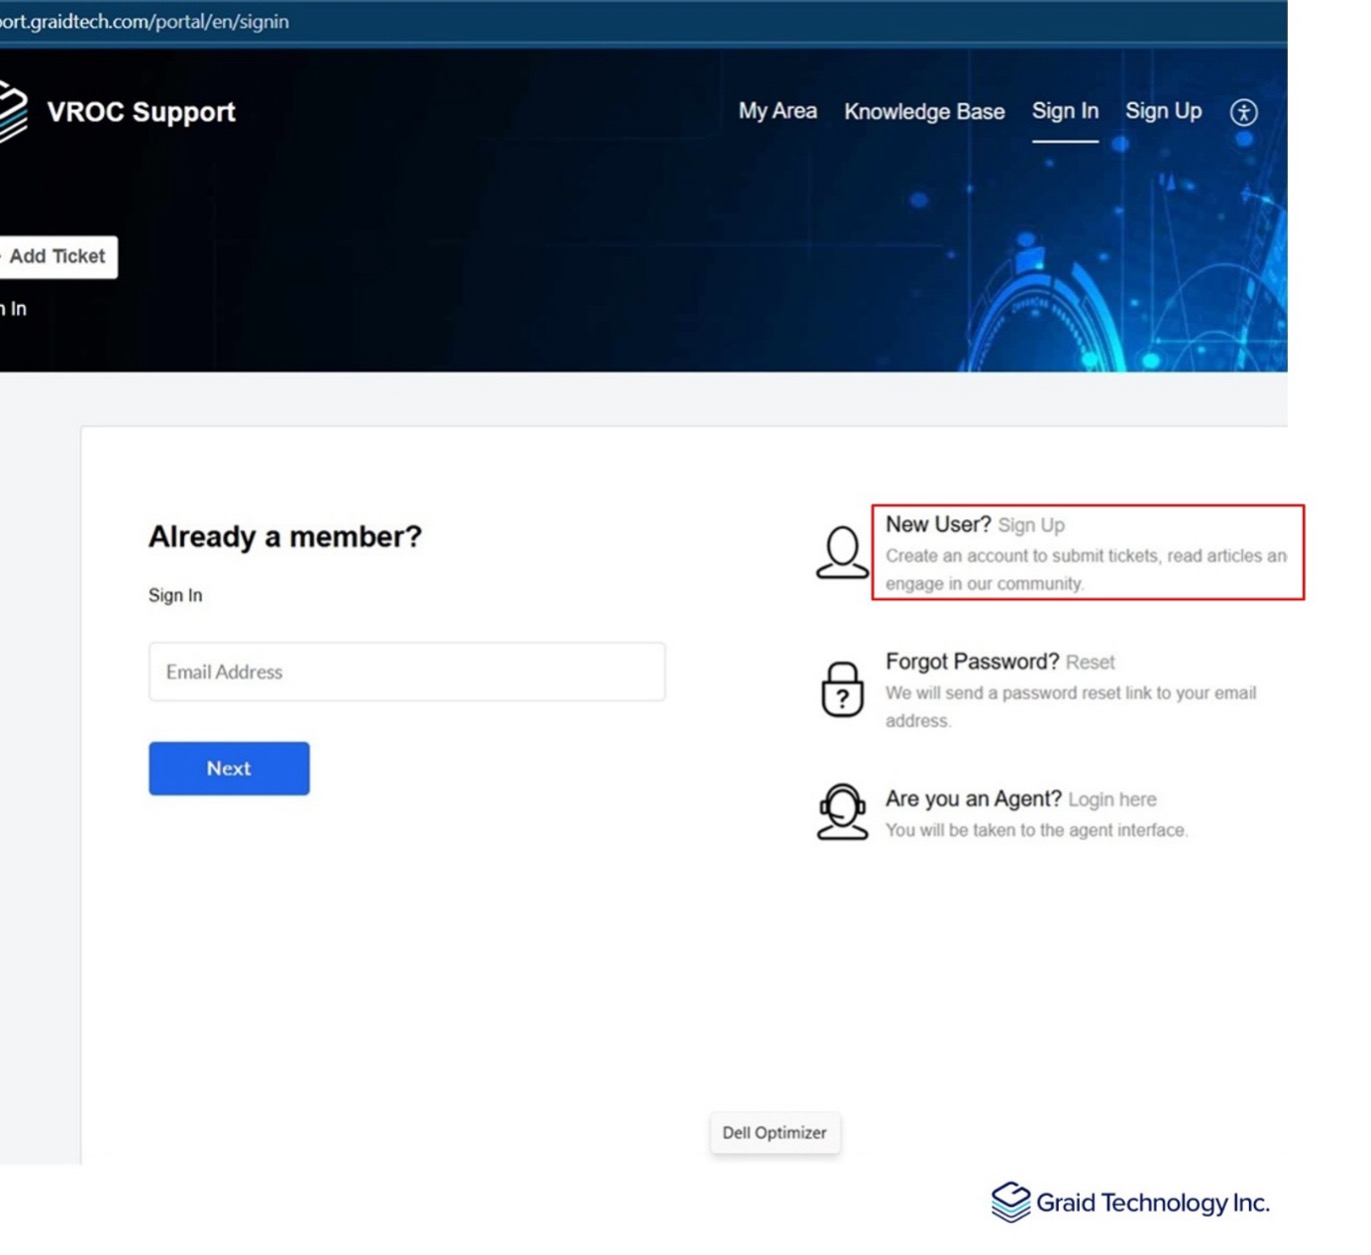
Step 1: Go to VROC Support Portal
Step 2: Select the Sign Up option on the right.
Notes
The section Already a member?, is for users that already have an account activated but will not be present once your account is activated. Accessing this site will automatically login the user.
Step 3: Fill Out the Sign-Up Form
In the Sign-up form:- Fill in all the fields in the form: Name, Email, text.
- Check the empty box.
- Click the Sign Up button.
- Once submitted, a Graid Technology admin will receive your request to approve.
- Once it has been approved by an admin, you will receive an email to activate your account. See example email below.
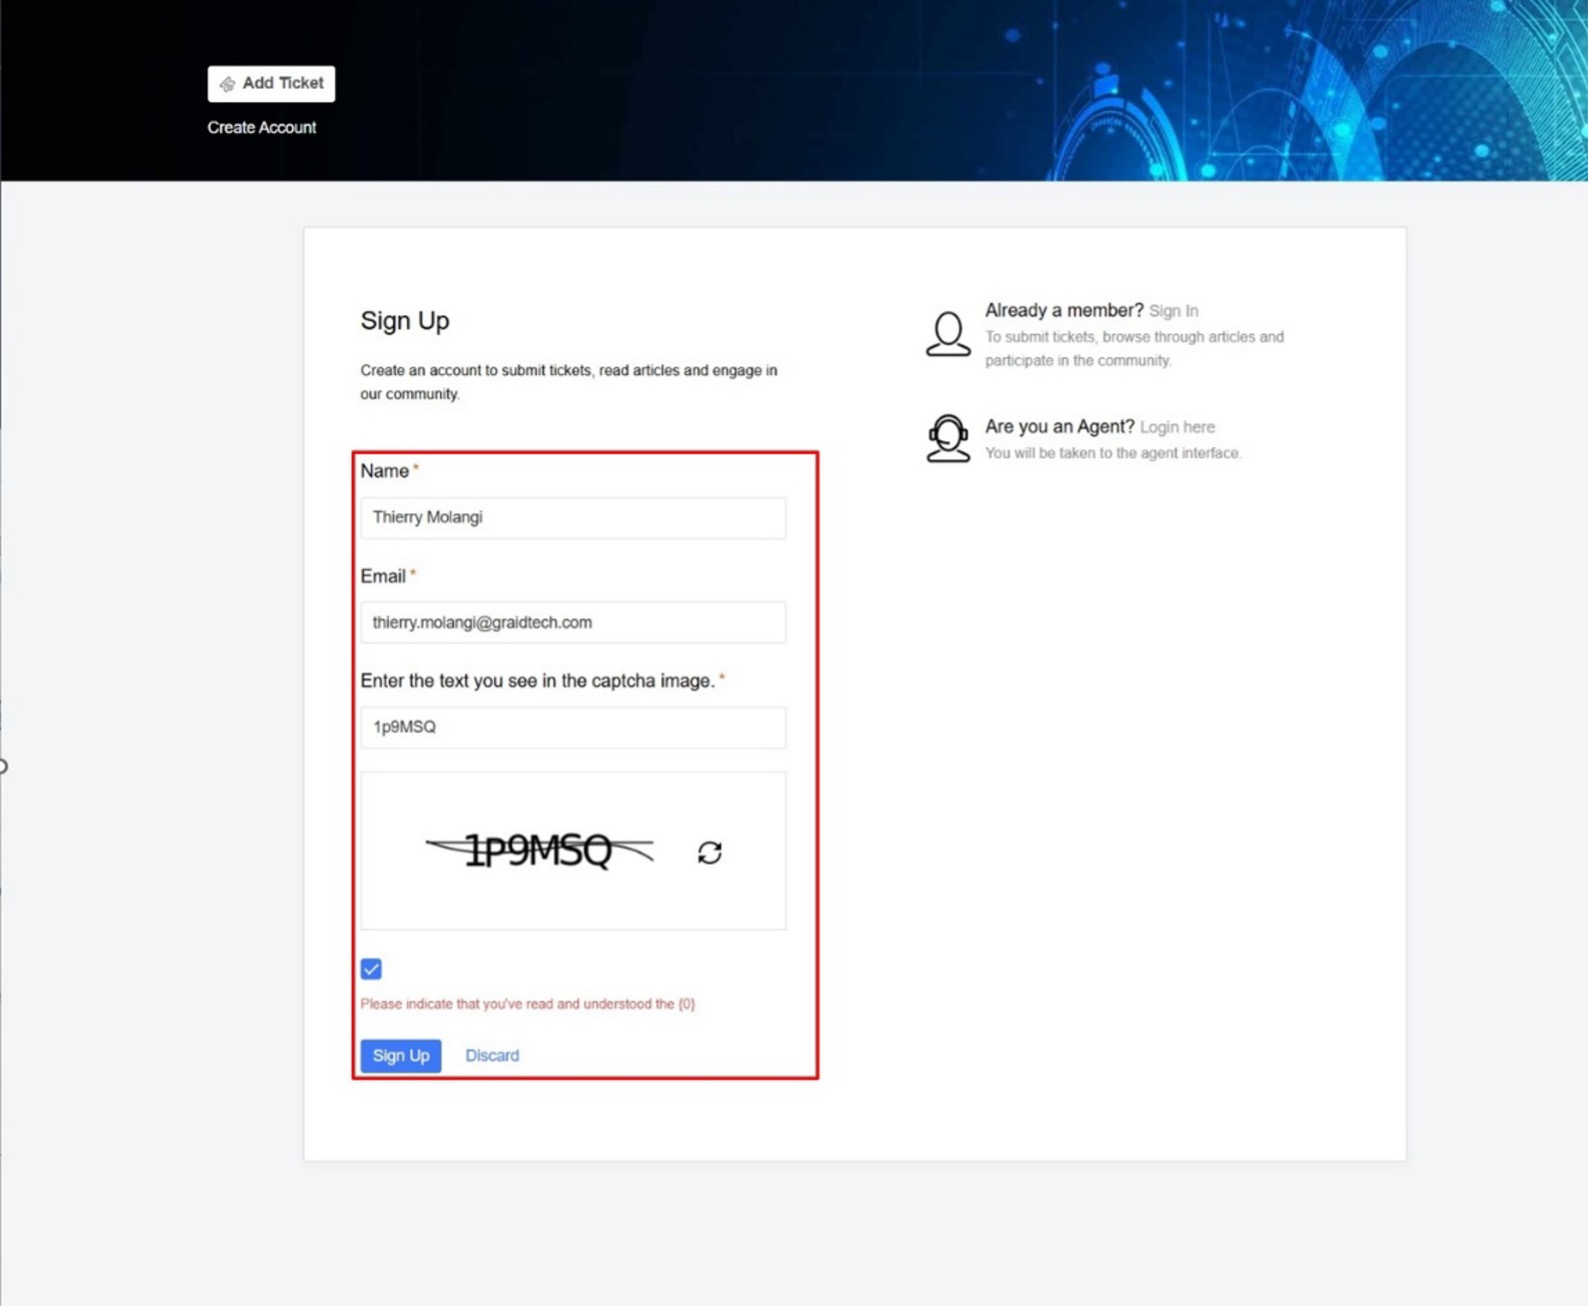
Sign-Up Form 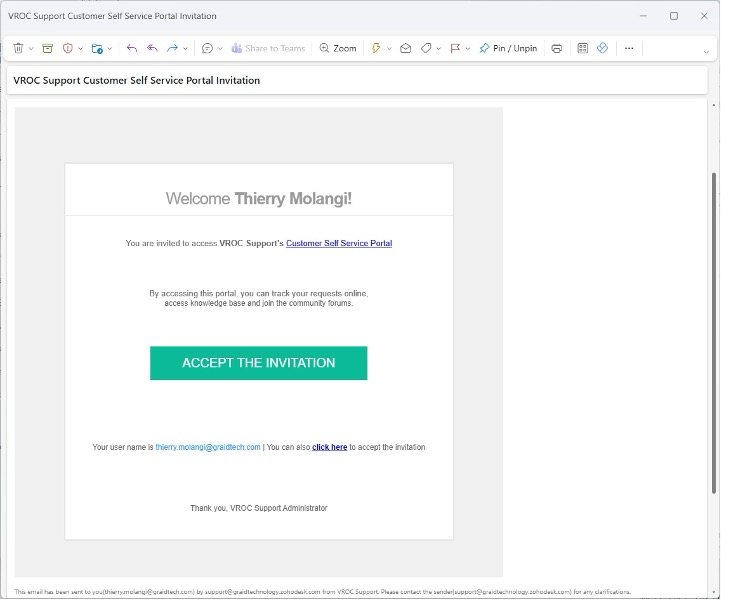
Email
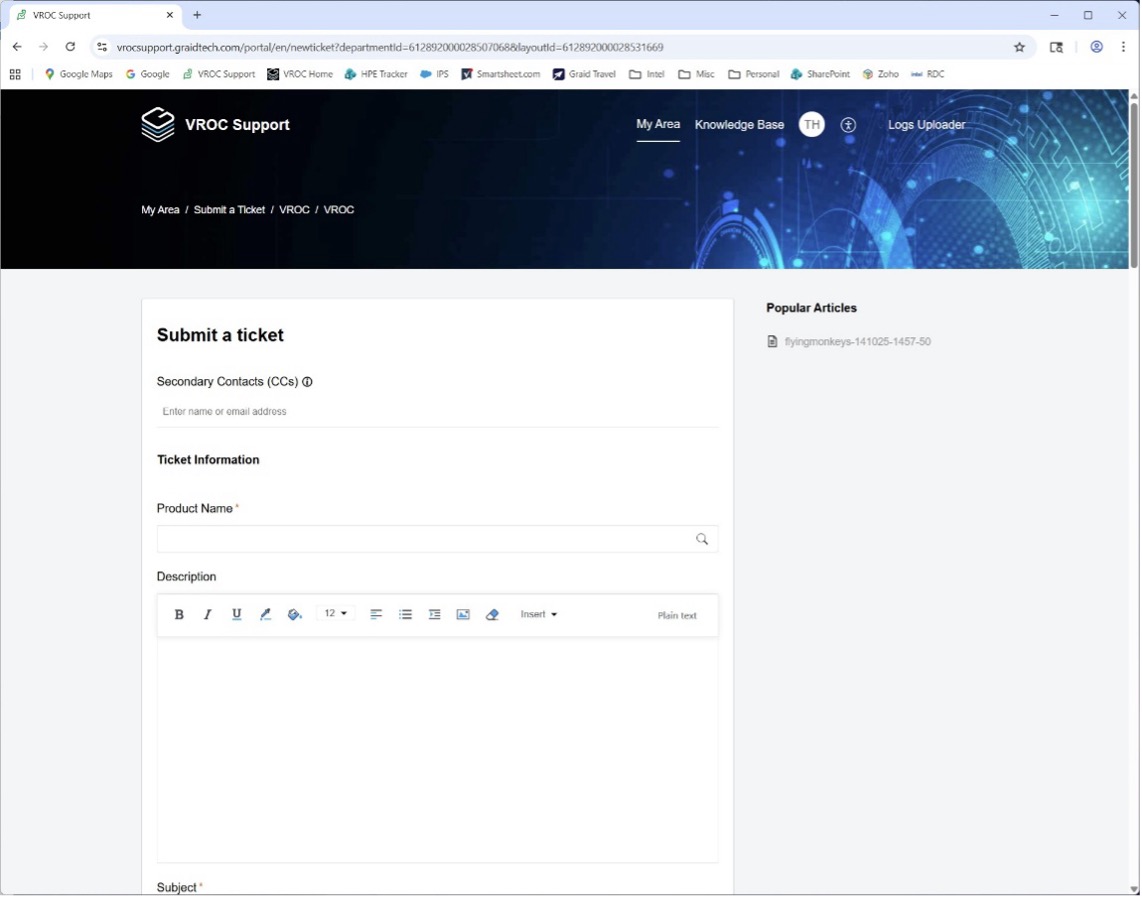
Submit a New Ticket
Step 1: Select Add Ticket button in the top banner or select Submit a New Ticket in the text.

Add ticket Step 2: Fill Out the Submit Ticket Form
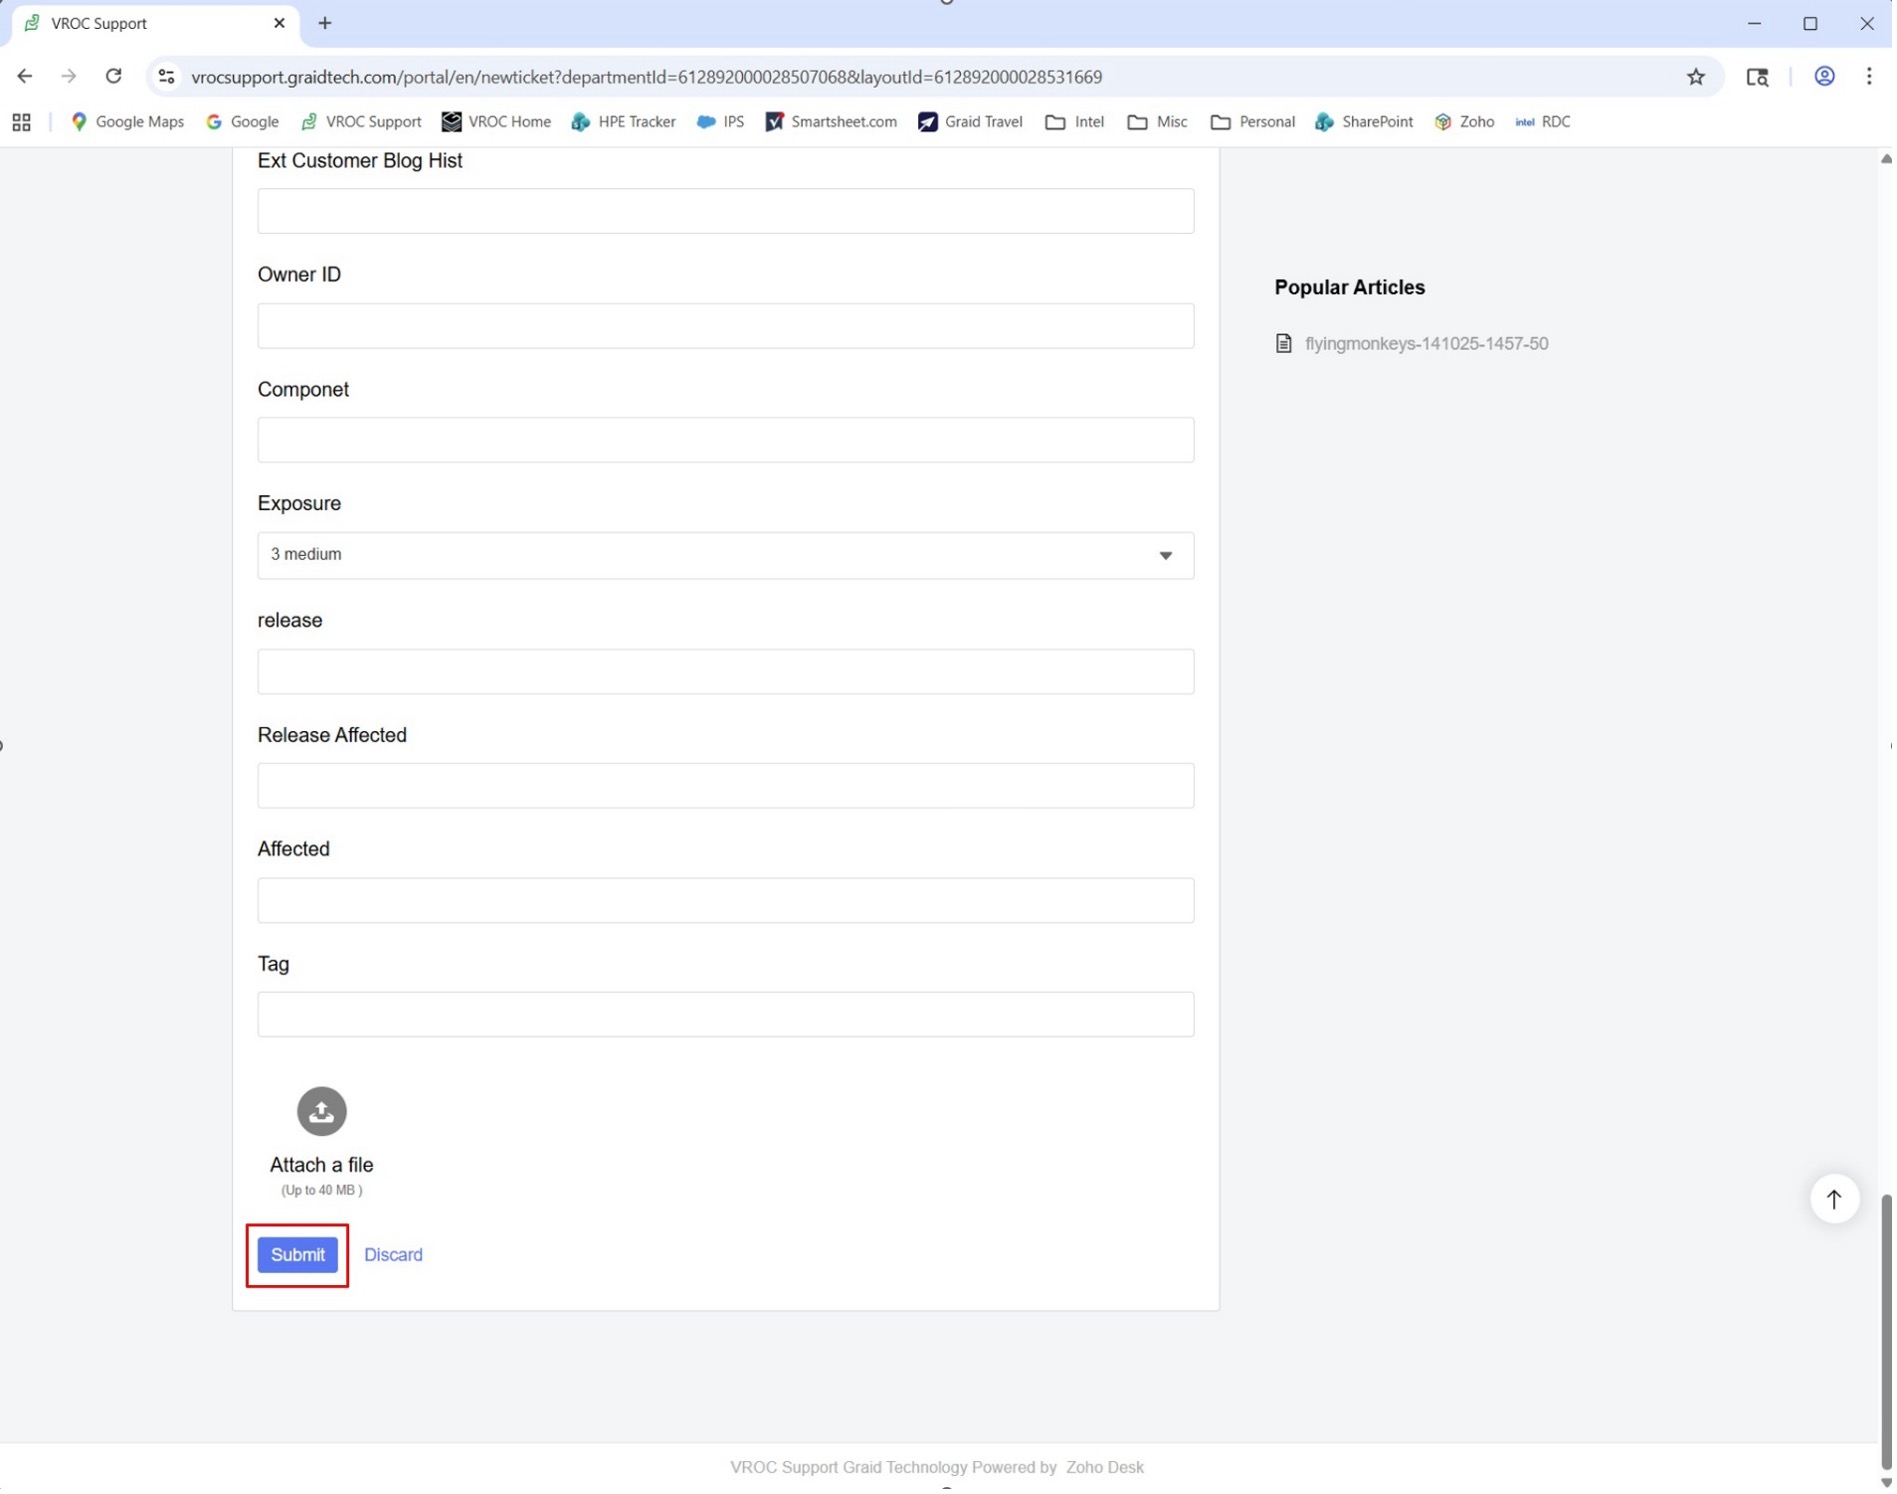
In the Submit a Ticket form, fill-in the following minimum fields. All other fields are currently optional:- Add email addresses of relevant stakeholders to Secondary Contacts (CCs) if needed.
- Enter issue details in the Description field.
- Add a text statement in Subject field
- For CPU Platform, select an appropriate CPU model
- For Issue Type, please select from the drop-down list.
- Enter your company name in Customer Company field
- In External Priority field, please enter one of the following priority types: Critical, High, Medium, Low.
- Enter the VROC driver version number in Driver Version field
- In Exposure field, please select from the drop-down list. This refers to the level of exposure the issue has, not the priority.
At the bottom of the form, attach any files you have that will help the Graid engineer root cause the issue/behavior reported: screenshots, logs captured, etc.
Notes
Below is an example of some details that are needed to be able to adequately root cause the issue reported. Please follow this example as it relates to your reported issue where applicable:
- Issue Description: After migrating my single system drive to a RAID 1 volume, the VROC GUI is showing it is in degraded state, and one drive is in missing state.
- Configuration Information:
- Platform: M50FCP2UR208 Server system.
- Drives: 4x Micron 7450 U.2 NVMe SSD. 2 drives for RAID 1 and the rest as passthrough drives. All 4 drives are installed in front drive chassis and the HSBP is connected to switch on x16 PCIe slot to CPU0.
- Operating System: WS2022.
- VROC version: 9.3.0.10037 and for VROC preOS, it is 9.2.0.1237
- How to Reproduce:
- Enable VMD on the domain which the drives are connected to.
- Install WS2022 on 1 drive.
- Install VROC in Windows.
- Create RAID 1 using the system disk and one other drive.
- Once completed, reboot, open VROC GUI and check drive and volume status.
- Expected results:
- The system disk migration to RAID 1 should be successful.
- Actual results:
- The RAID 1 volume is in “Degraded” state, one of the member drives is in “Missing” state. The member drive that was specified when creating the RAID 1 is incorrectly showing as “Pass Through” state.
- Additional information:
- In BIOS, it is showing correctly.
- Cannot reproduce with WS2025.
- Cannot reproduce with previous version of VROC 9.1.0.1449
Step 3: After filling in all the above fields, select Submit at the bottom of the form.
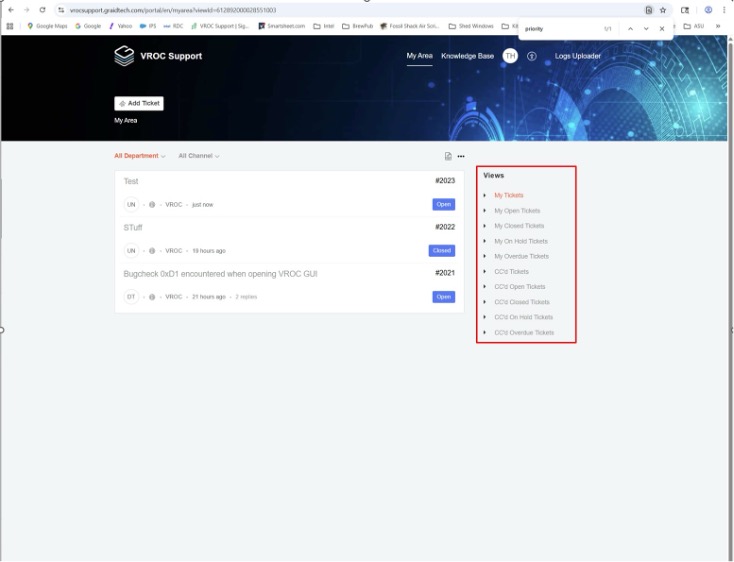
Submit - Once submitted, the web page will refresh and present all tickets you have submitted. Your new ticket will be assigned to a Graid Customer Engineer, and they will get back with you shortly.
Notes
You can manage all your tickets from this page, whether you are the owner or have been added as secondary contact. Use the Views options on the right to show tickets based on your criteria.
Updating/Responding to a Ticket
Step 1: Click the Ticket
To update a ticket, click on the title of the ticket you wish to edit or update.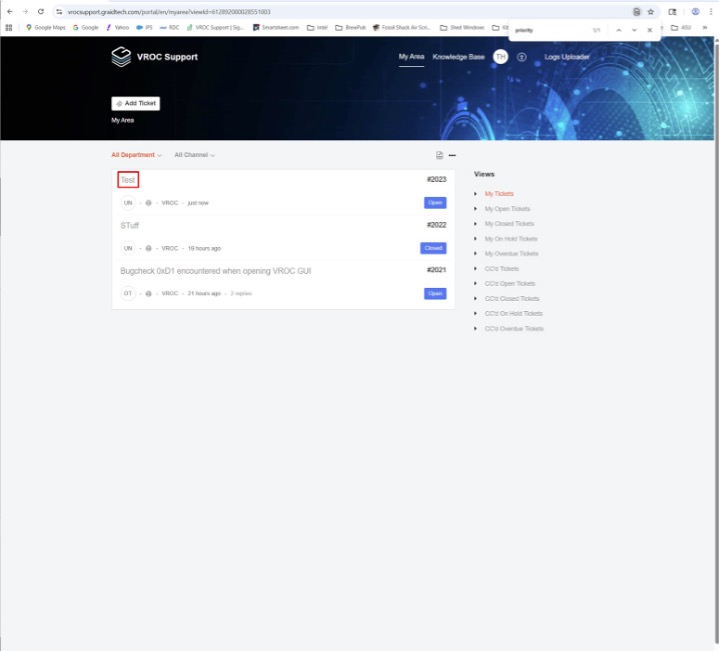
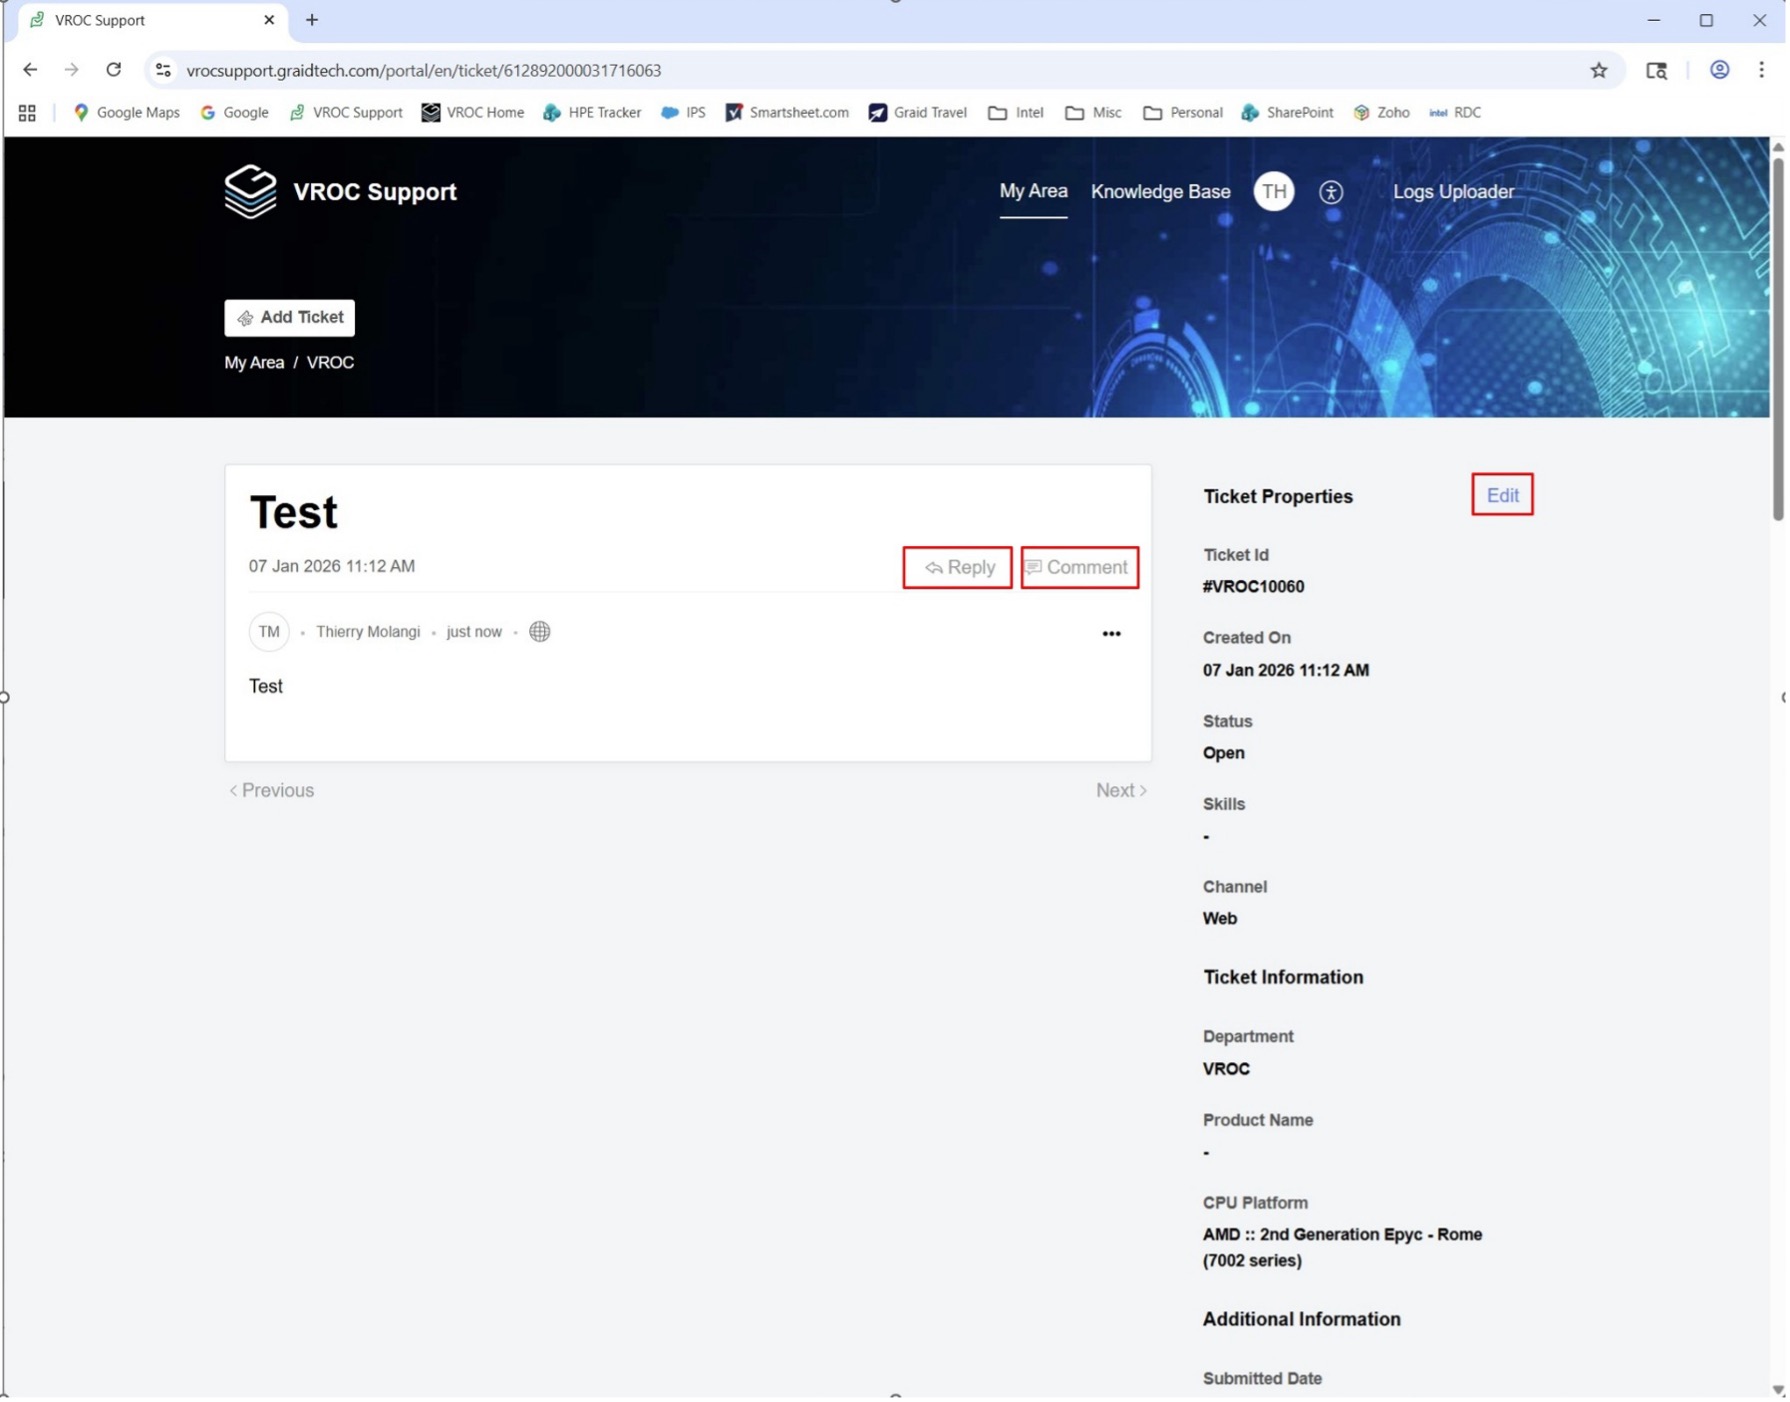
Click ticket Step 2: Select Reply or Comment
- Select Reply or Comment whether you are responding to an inquiry from the Graid Technology representative or adding additional information/comment to the ticket.
- Use the Edit on the button if you need to change any ticket property.
Select Reply or Comment Step 3: Add your reply or comment
- Use Attach a File to add any related attachments (screenshots, logs, etc) if applicable.
- Use the Edit on the button if you need to change any ticket property.
- Select Send or Add Comment to complete the ticket update.

Send the Comment