How To Move an Intel® Virtual RAID on CPU (Intel® VROC) RAID Volume to a New System on Intel® Server Boards
How To Move an Intel® Virtual RAID on CPU (Intel® VROC) RAID Volume to a New System on Intel® Server Boards
How To Move an Intel® Virtual RAID on CPU (Intel® VROC) RAID Volume to a New System on Intel® Server Boards
Category:Maintenance & PerformanceArticle ID:000098194Environment:Intel® Server BoardsDate:2/7/25
At some point, you may have to replace your Intel® Server Board, potentially due to warranty replacement.
Follow the steps below to move RAID volumes from one system to another with a reduced risk of data loss.
Note
It is always recommended to back up all data before proceeding with the steps below.
This should only be done when the old system and new system are the exact same models with same hardware and software configurations. Example: Make sure the BIOS version is the same on both systems.
If any issues with failed volumes are encountered during this process, they can be attempted to be reset to normal through the UEFI HII menu.
A SATA RAID array is used in this case. To learn more about how to configure an Intel® VROC (VMD NVMe* RAID) Array for NVMe* drives, consult the system user guide as the BIOS settings are slightly different.
Power down the current system to be replaced.
Disconnect the drives.
Reconnect the drives to the new system in the same slots they were removed from in the old system. Make sure the drives are properly installed.
Power on the system and enter the BIOS by pressing the key F2.
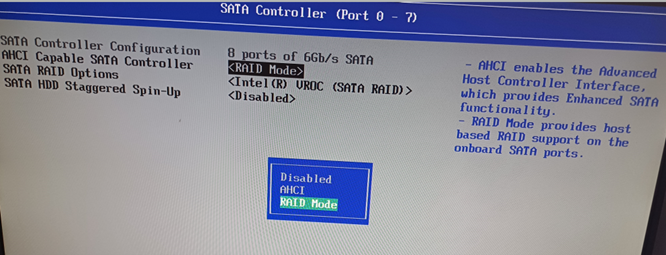
Navigate to Advanced > Mass Storage Controller Configuration > SATA Controller and/or sSATA Controller.
In the AHCI Capable SATA Controller field, selectRAID Mode option.
Press the key F10 to save and restart the system.
Boot to the BIOS by pressing the key F2 during power-on.
Navigate to Advanced > PCI Configuration > UEFI Option ROM Control.
Scroll to the bottom of the screen and select the option Intel® VROC SATA Controller.
Verify the RAID configuration is set properly to match what was on the previous system.
Press the key F10 to save.
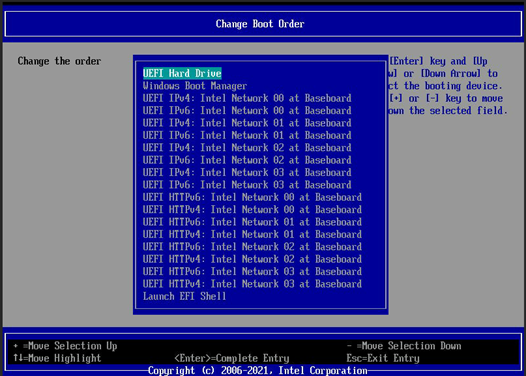
If this is a boot volume, navigate to the menu Boot Maintenance Manager and change the Boot Order menu.