Graid Order Management Portal: Customer Guide
This guide explains how OEM customers can access the Graid Order Management Portal and place orders online.
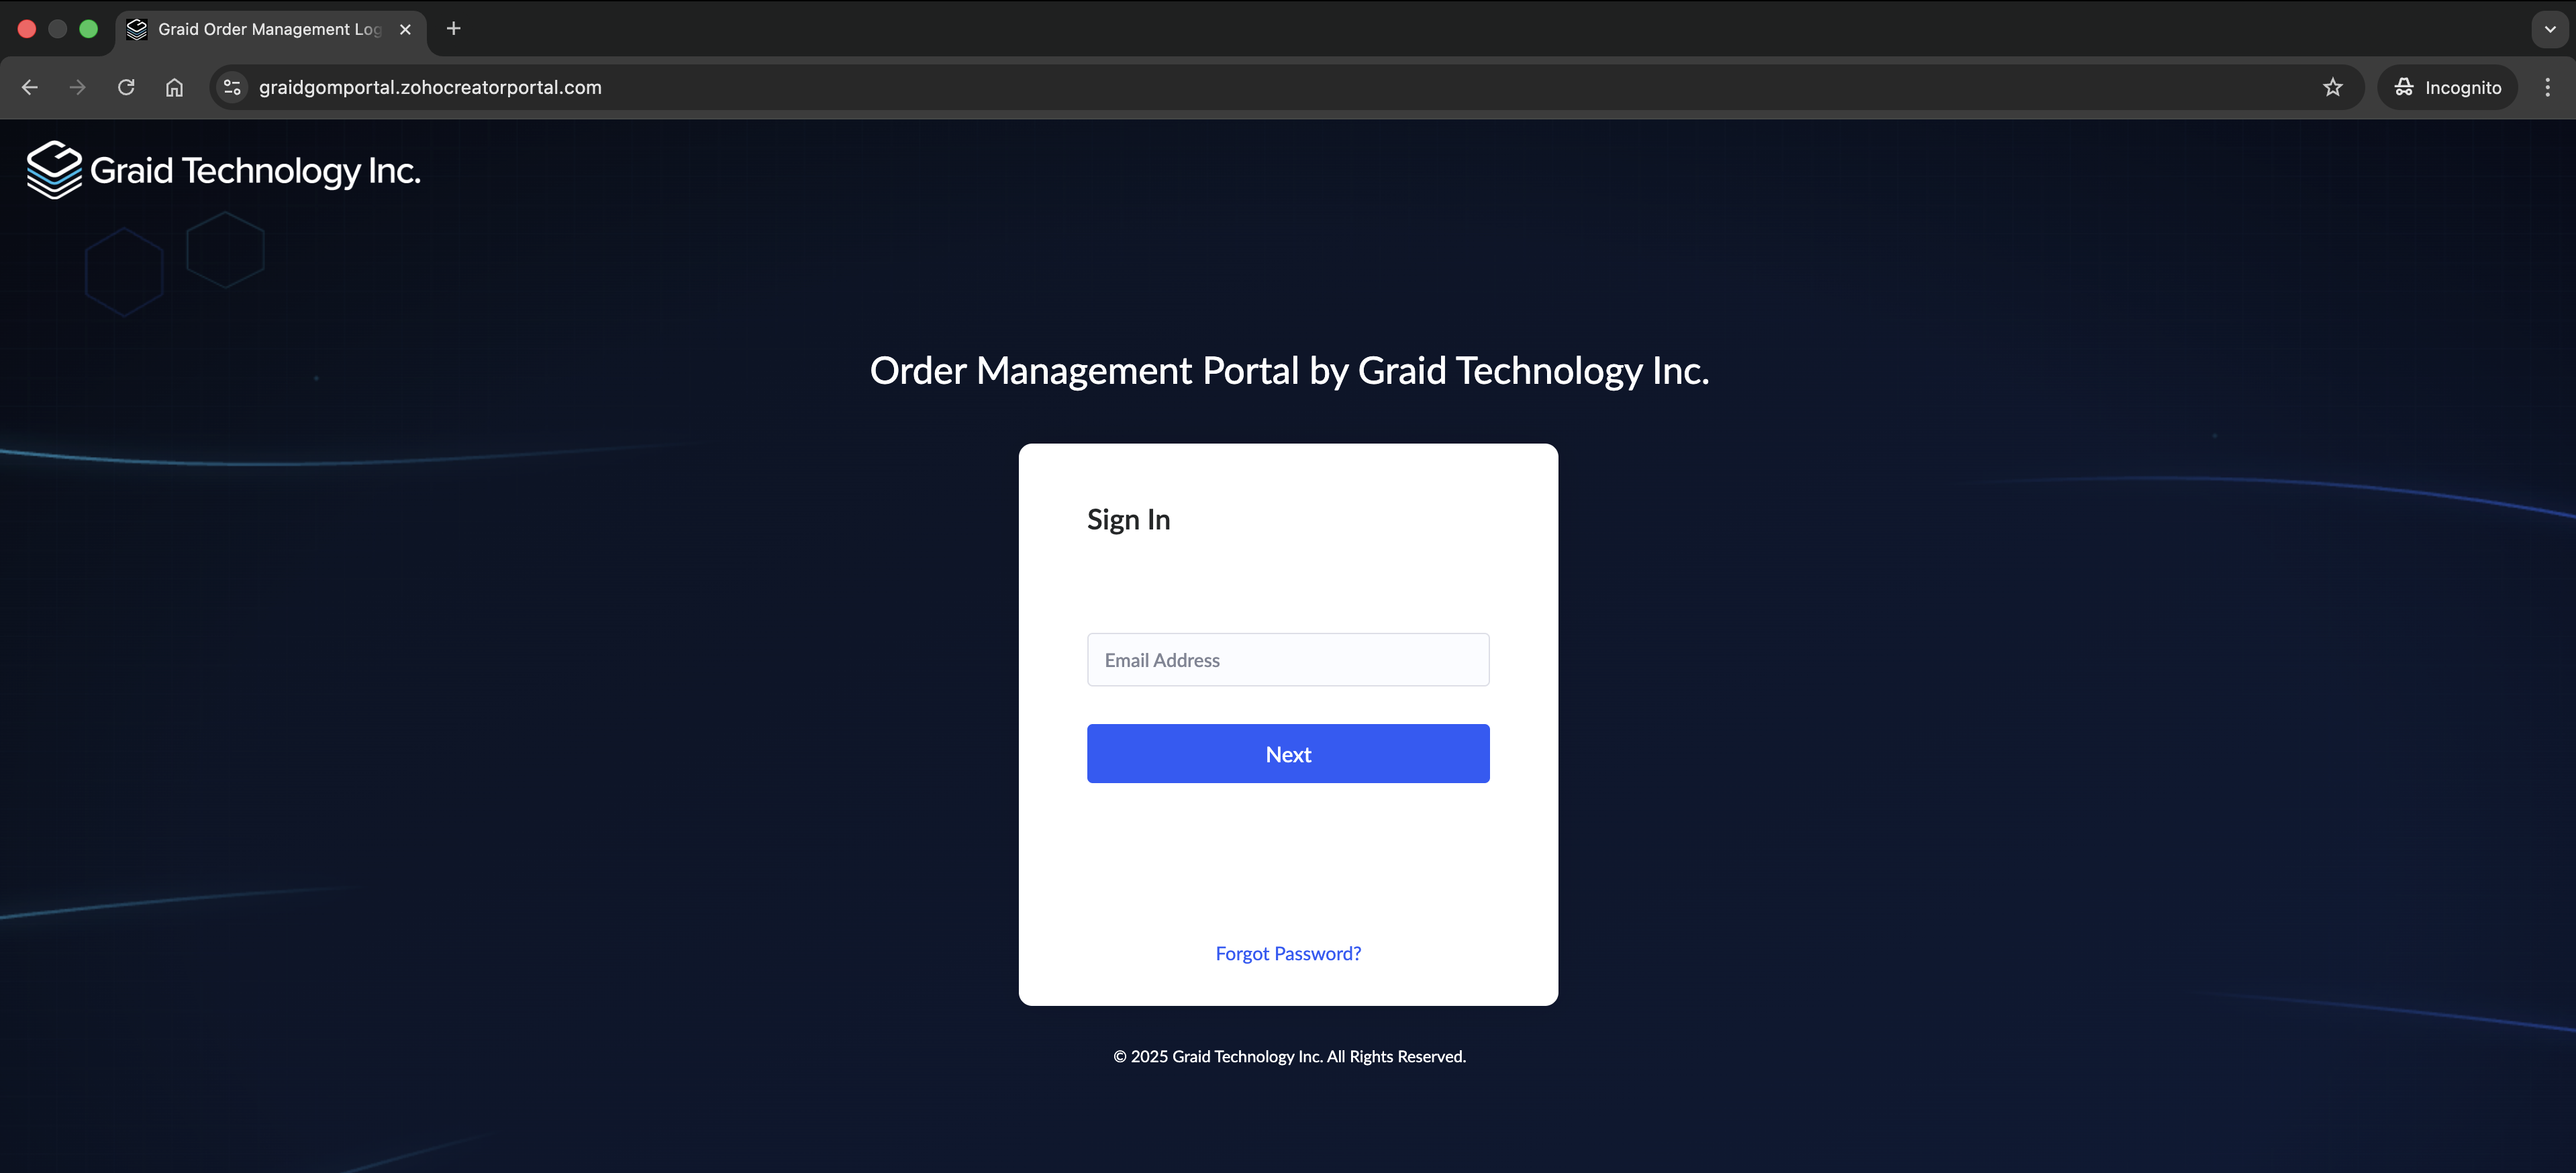
Portal URL: https://graidgomportal.zohocreatorportal.com/
User Guide for Graid Order Management
Access and sign in
- Open the portal in a modern browser (Chrome, Edge, or Firefox).
- Enter the company email registered for your portal access, then follow the sign-in steps.
- First time here or locked out? Use Forgot Password? or ask your company’s Graid representative to invite you.
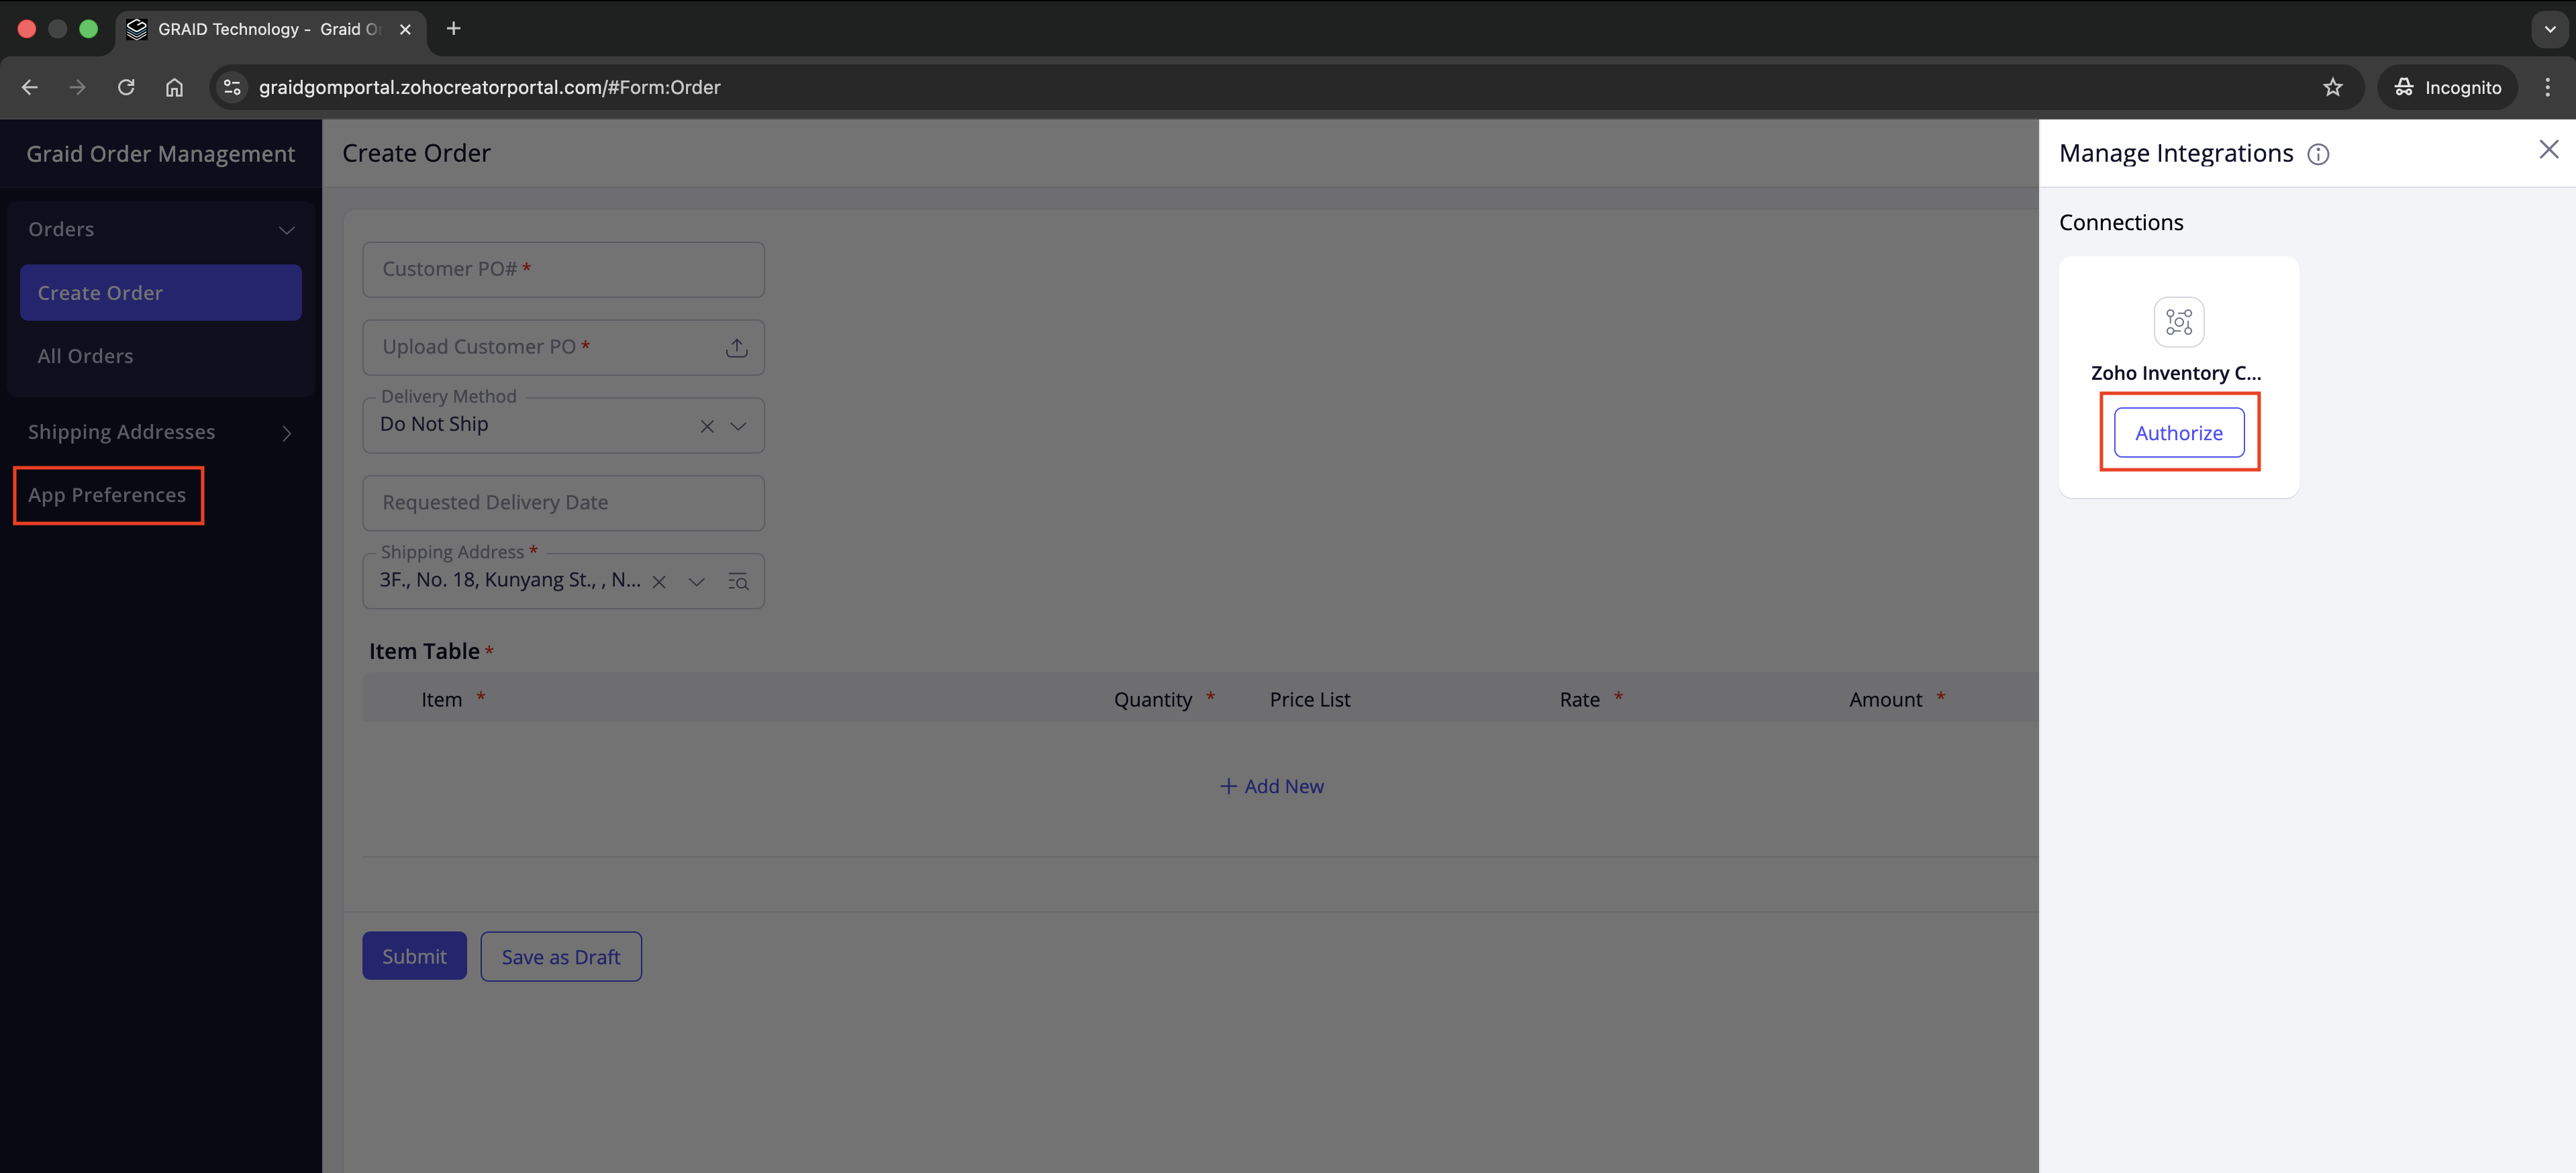
Authorize connection in the first login
On your first login, you need to authorize this connection so the portal can load items, price lists, and addresses.
Steps
- In the left navigation, select App Preferences.
The Manage Integrations panel opens. - In the Zoho Inventory Connector card, click Authorize.
- When prompted:
- Sign in with the Zoho account that manages your company’s Inventory organization.
- If you belong to multiple organizations, choose the correct one.
- Approve the requested permissions.
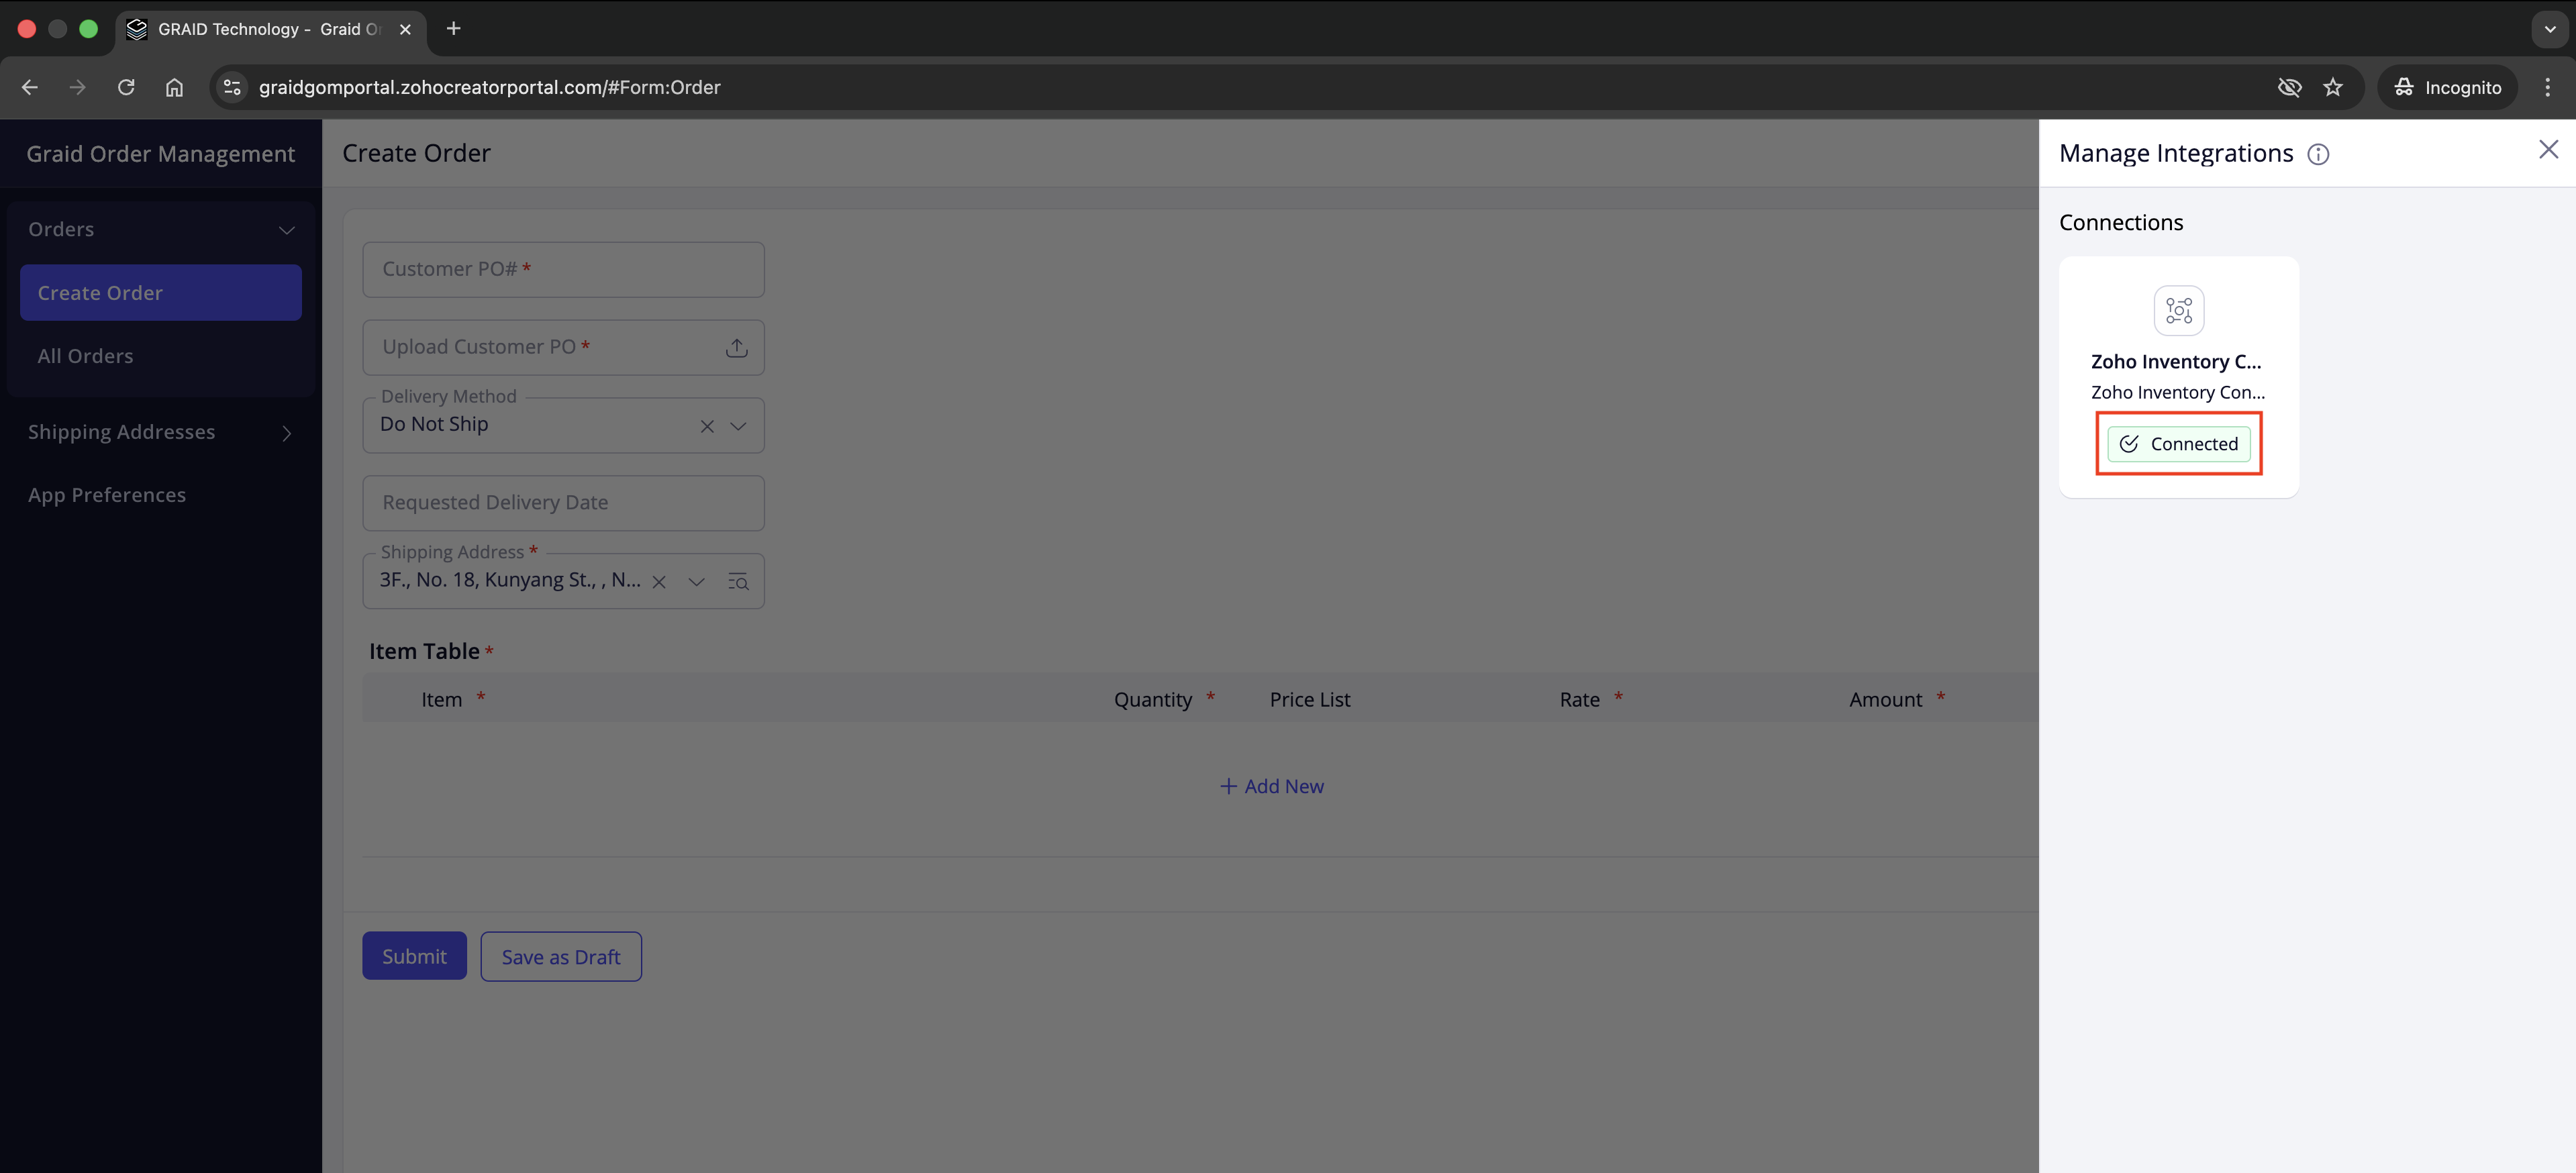
Successful authorization
- The connector card shows a green Connected badge.
- Close the panel and proceed to Orders > Create Order.
Tips
- If you do not see App Preferences or the Authorize button, your account may not have permission or the connection is already set up. Contact your Graid representative.
- If nothing happens after clicking Authorize, allow pop-ups for
graidgomportal.zohocreatorportal.comand try again.
Order management
Create a new order
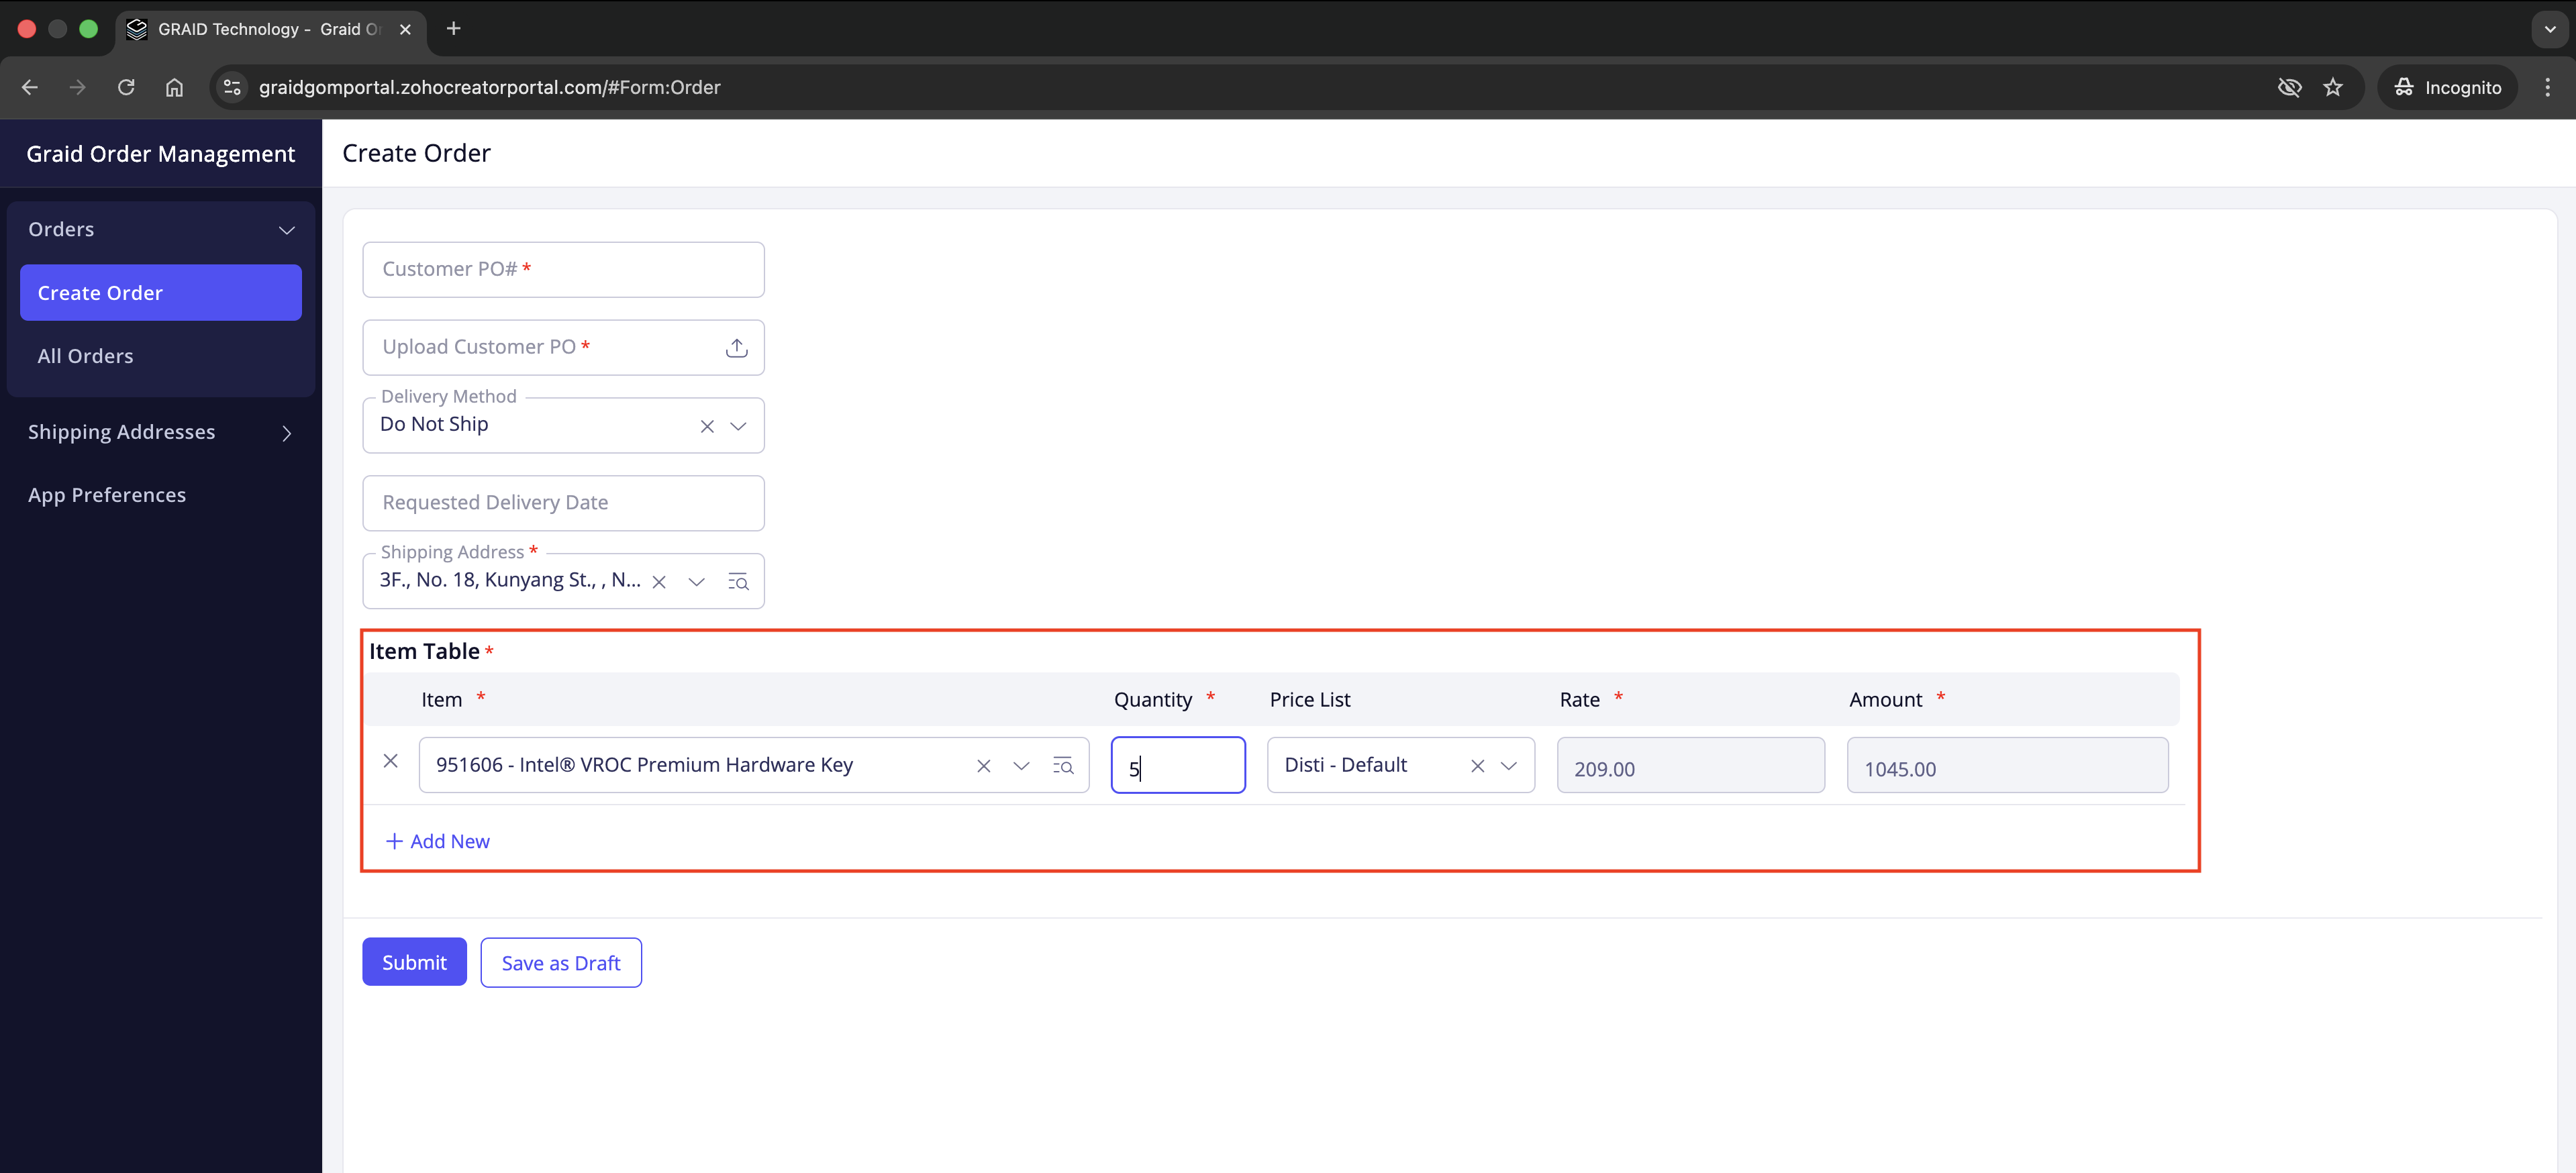
- Go to Orders → Create Order.
- Complete the required fields (marked with
*):- Customer PO #
- Upload Customer PO (attach your purchase order file)
- Delivery Method (select a listed option; choose Other to specify a carrier/service)
- Shipping Address: choose from your saved addresses. If you do not have one yet, see Add a shipping address to create one.
- Optional:
- Requested Delivery Date (enter a preferred delivery date if needed)
Tips
If the order is for electronic delivery (for example, license keys only), select Do Not Ship as the delivery method.
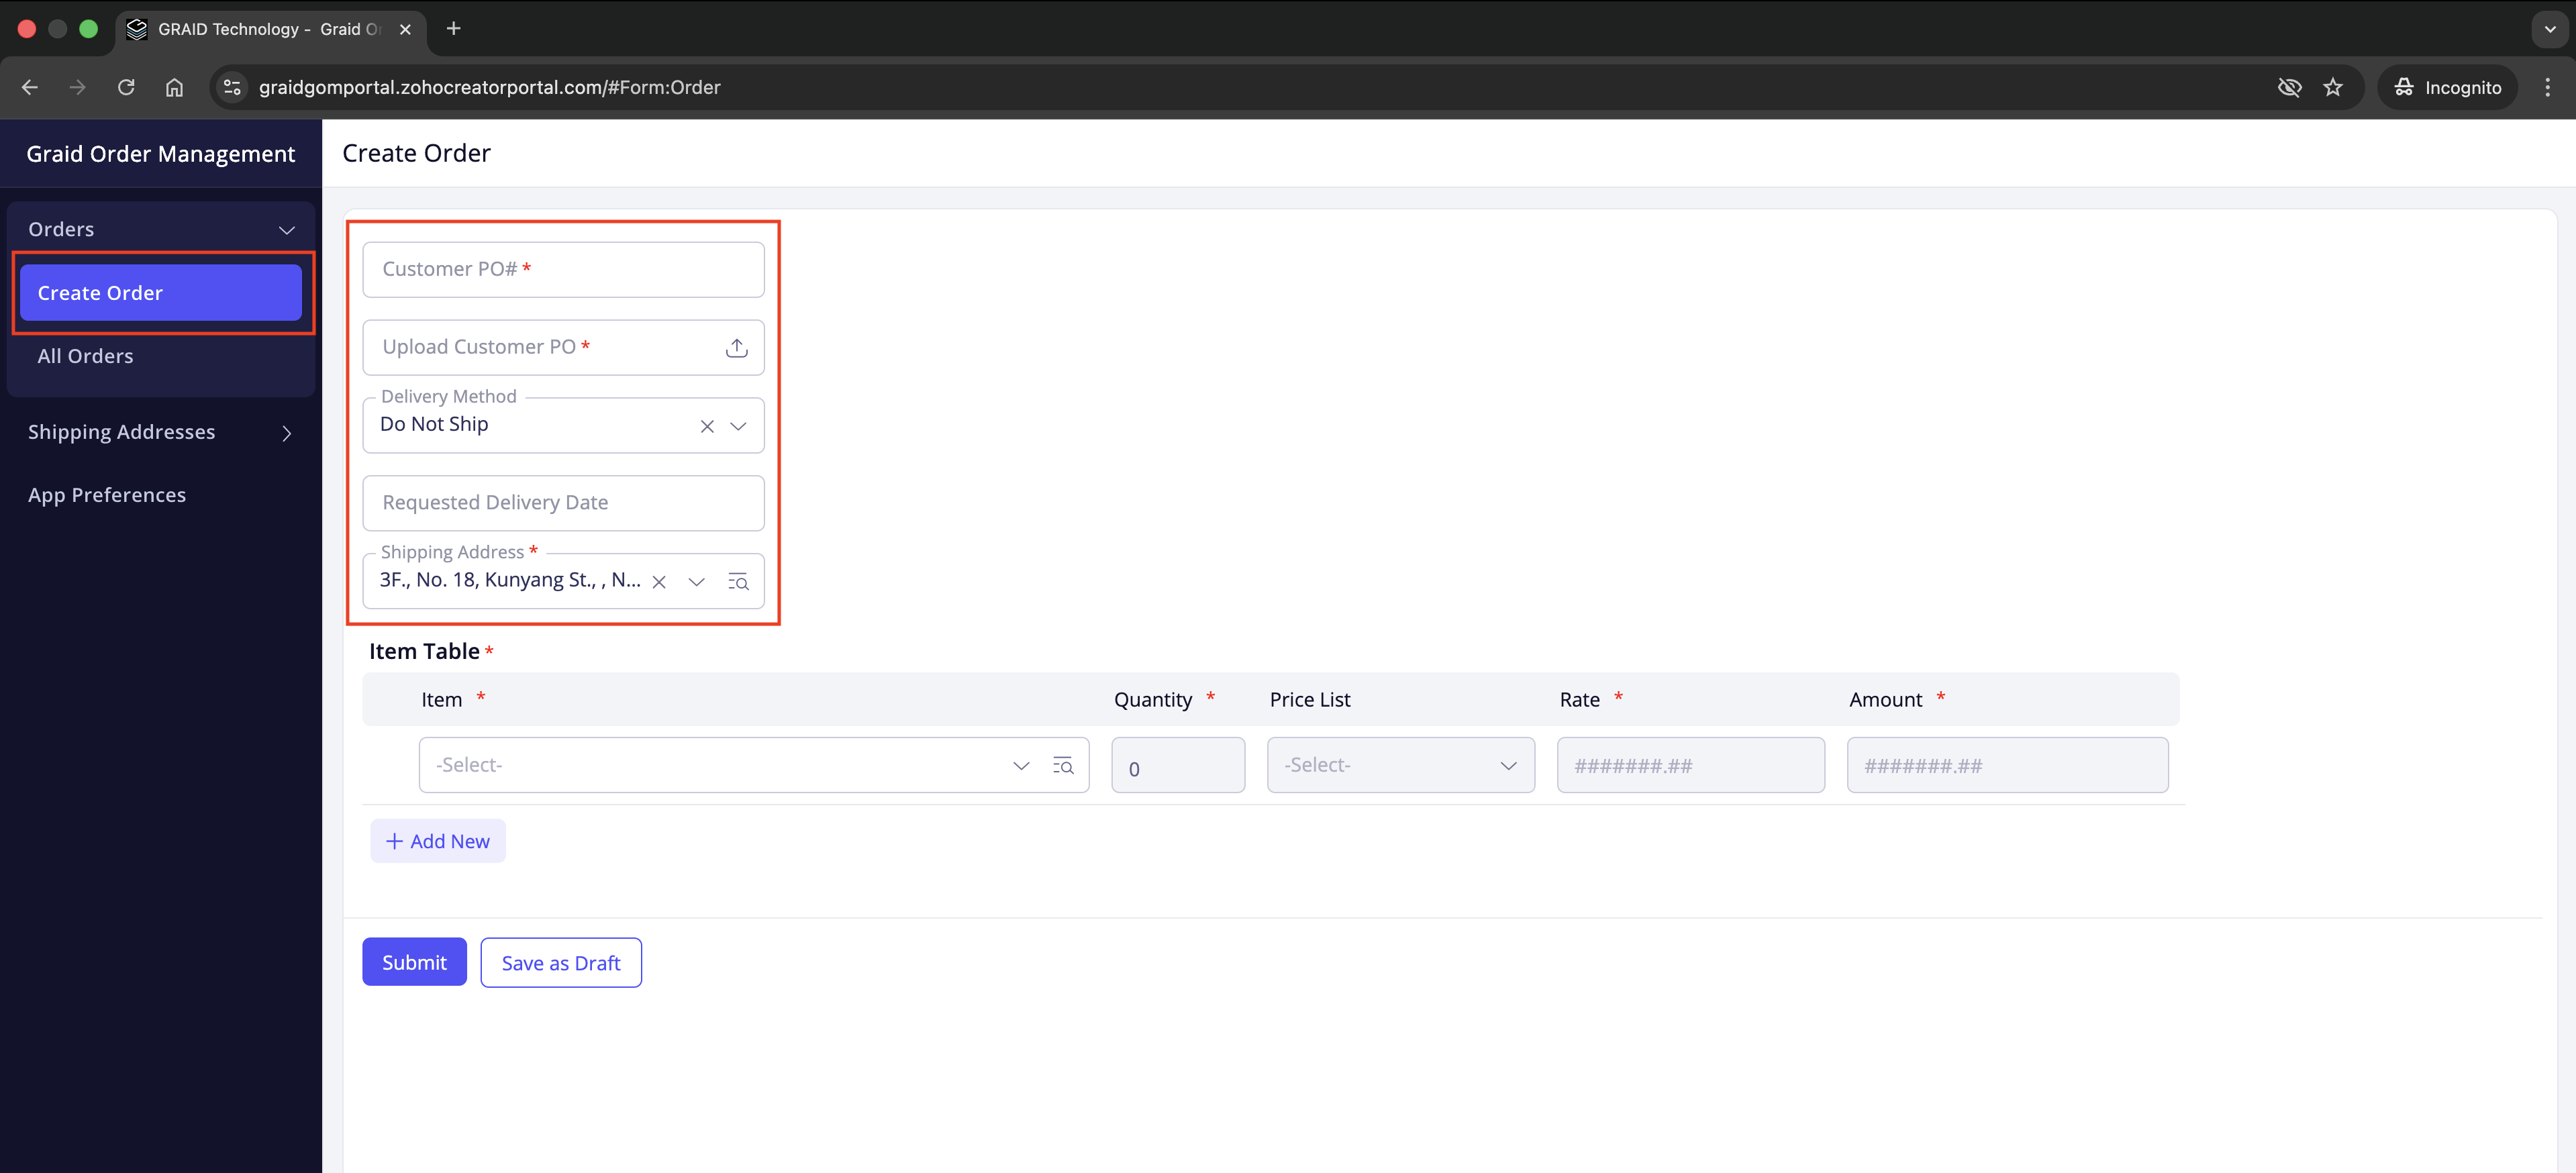
Add items
- In the Item Table:
- Choose the Item from the dropdown.
- Enter Quantity.
- Rate and Amount fill automatically based on your contracted pricing.
- Select + Add New to add more lines or remove a line with the row delete control.
Notes
- Some items use an order multiple. If the quantity you enter does not match that multiple, the system will round it up to the next valid multiple.
- Change the price list only after you have requested and received confirmation from your Graid representative.
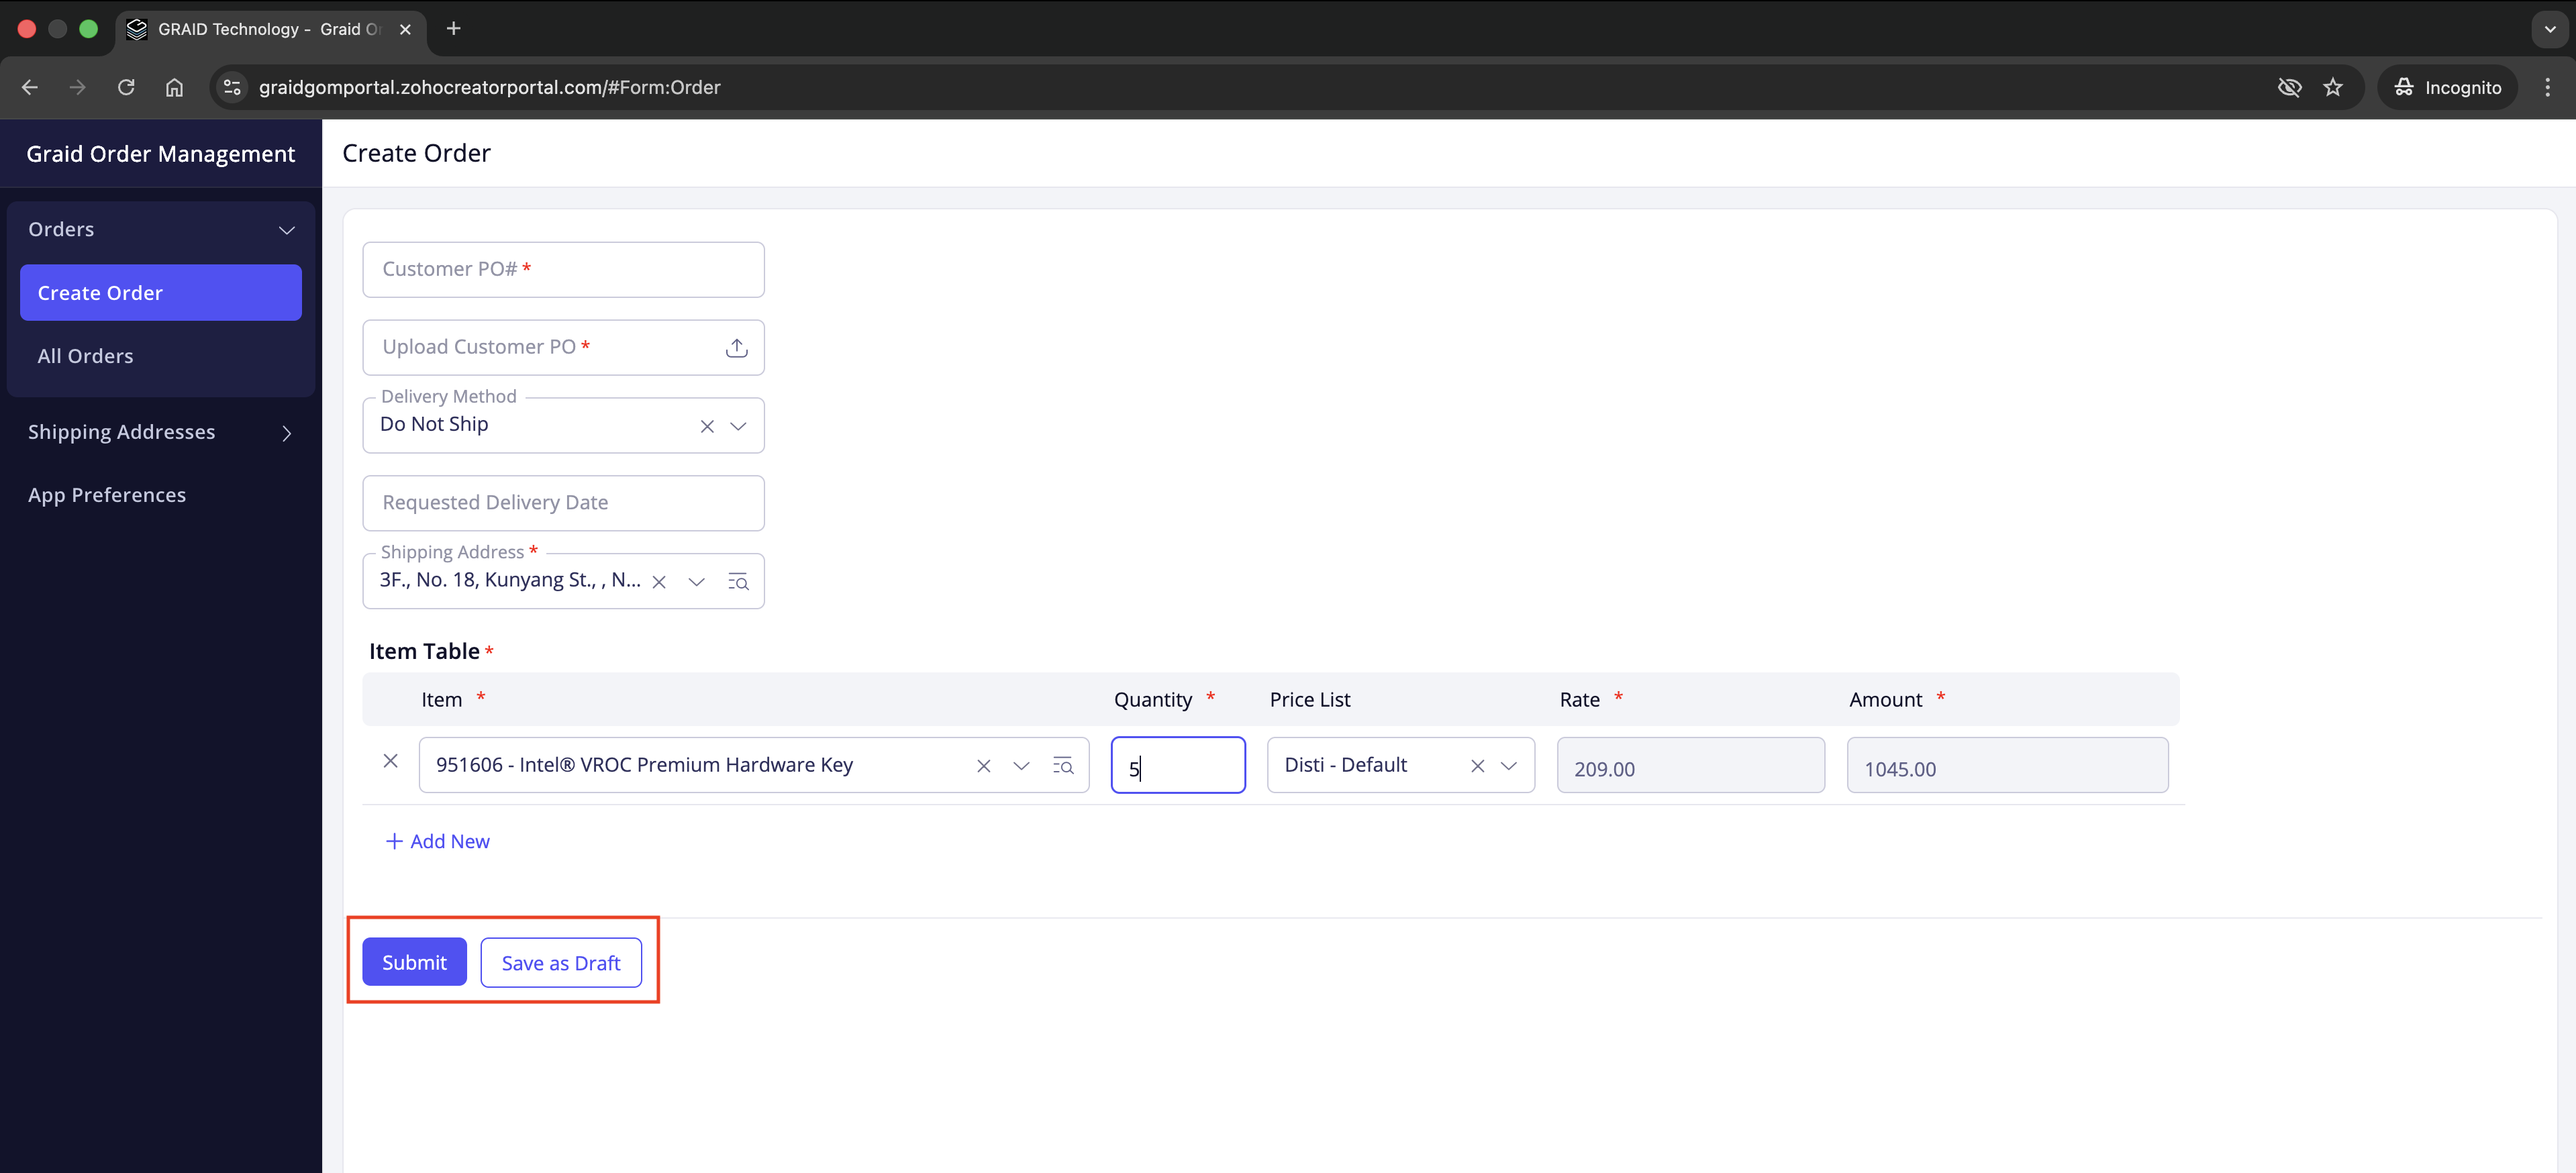
Submit or save your order
- Select Submit to send the order to Graid for processing.
- Select Save as Draft to finish later. Drafts are not processed until submitted.
- After submission, the portal confirms with an Order Number.
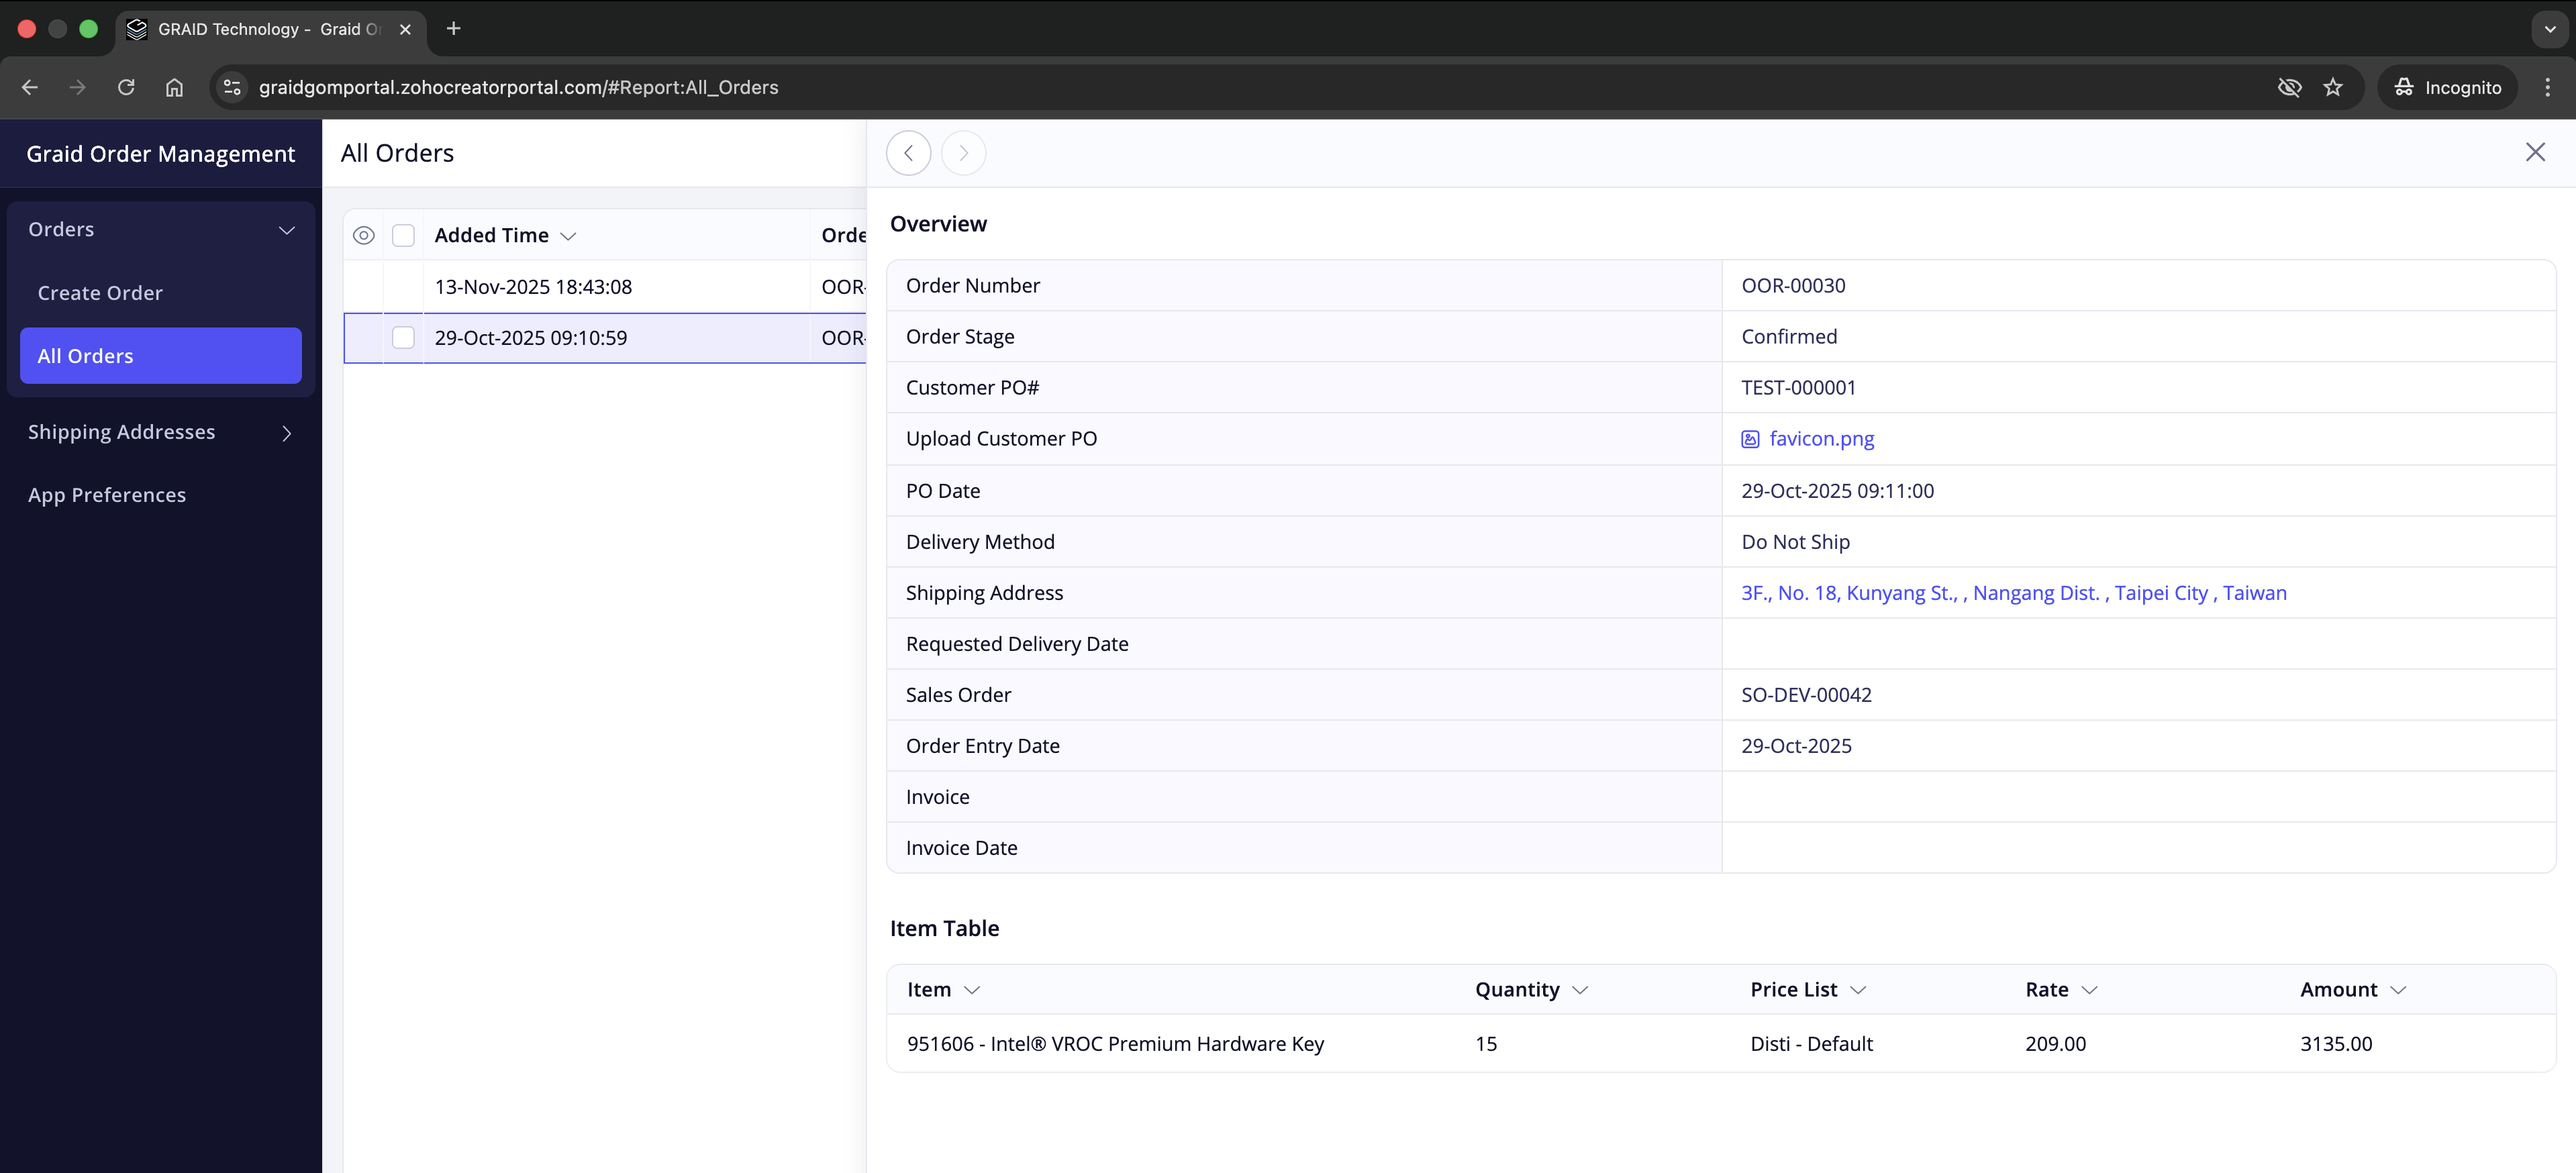
Track your orders
- Go to Orders → All Orders.
- Select a row to view details such as:
- Order Number
- Order Stage (for example: Submitted, Approved, Rejected, Confirmed, In Fulfillment)
- Customer PO #
- Uploaded Customer PO
- PO Date, Delivery Method, Shipping Address
- Item Table with quantities and amounts
Tips
Use the column filters to find specific orders quickly.
Manage shipping addresses
Add a shipping address
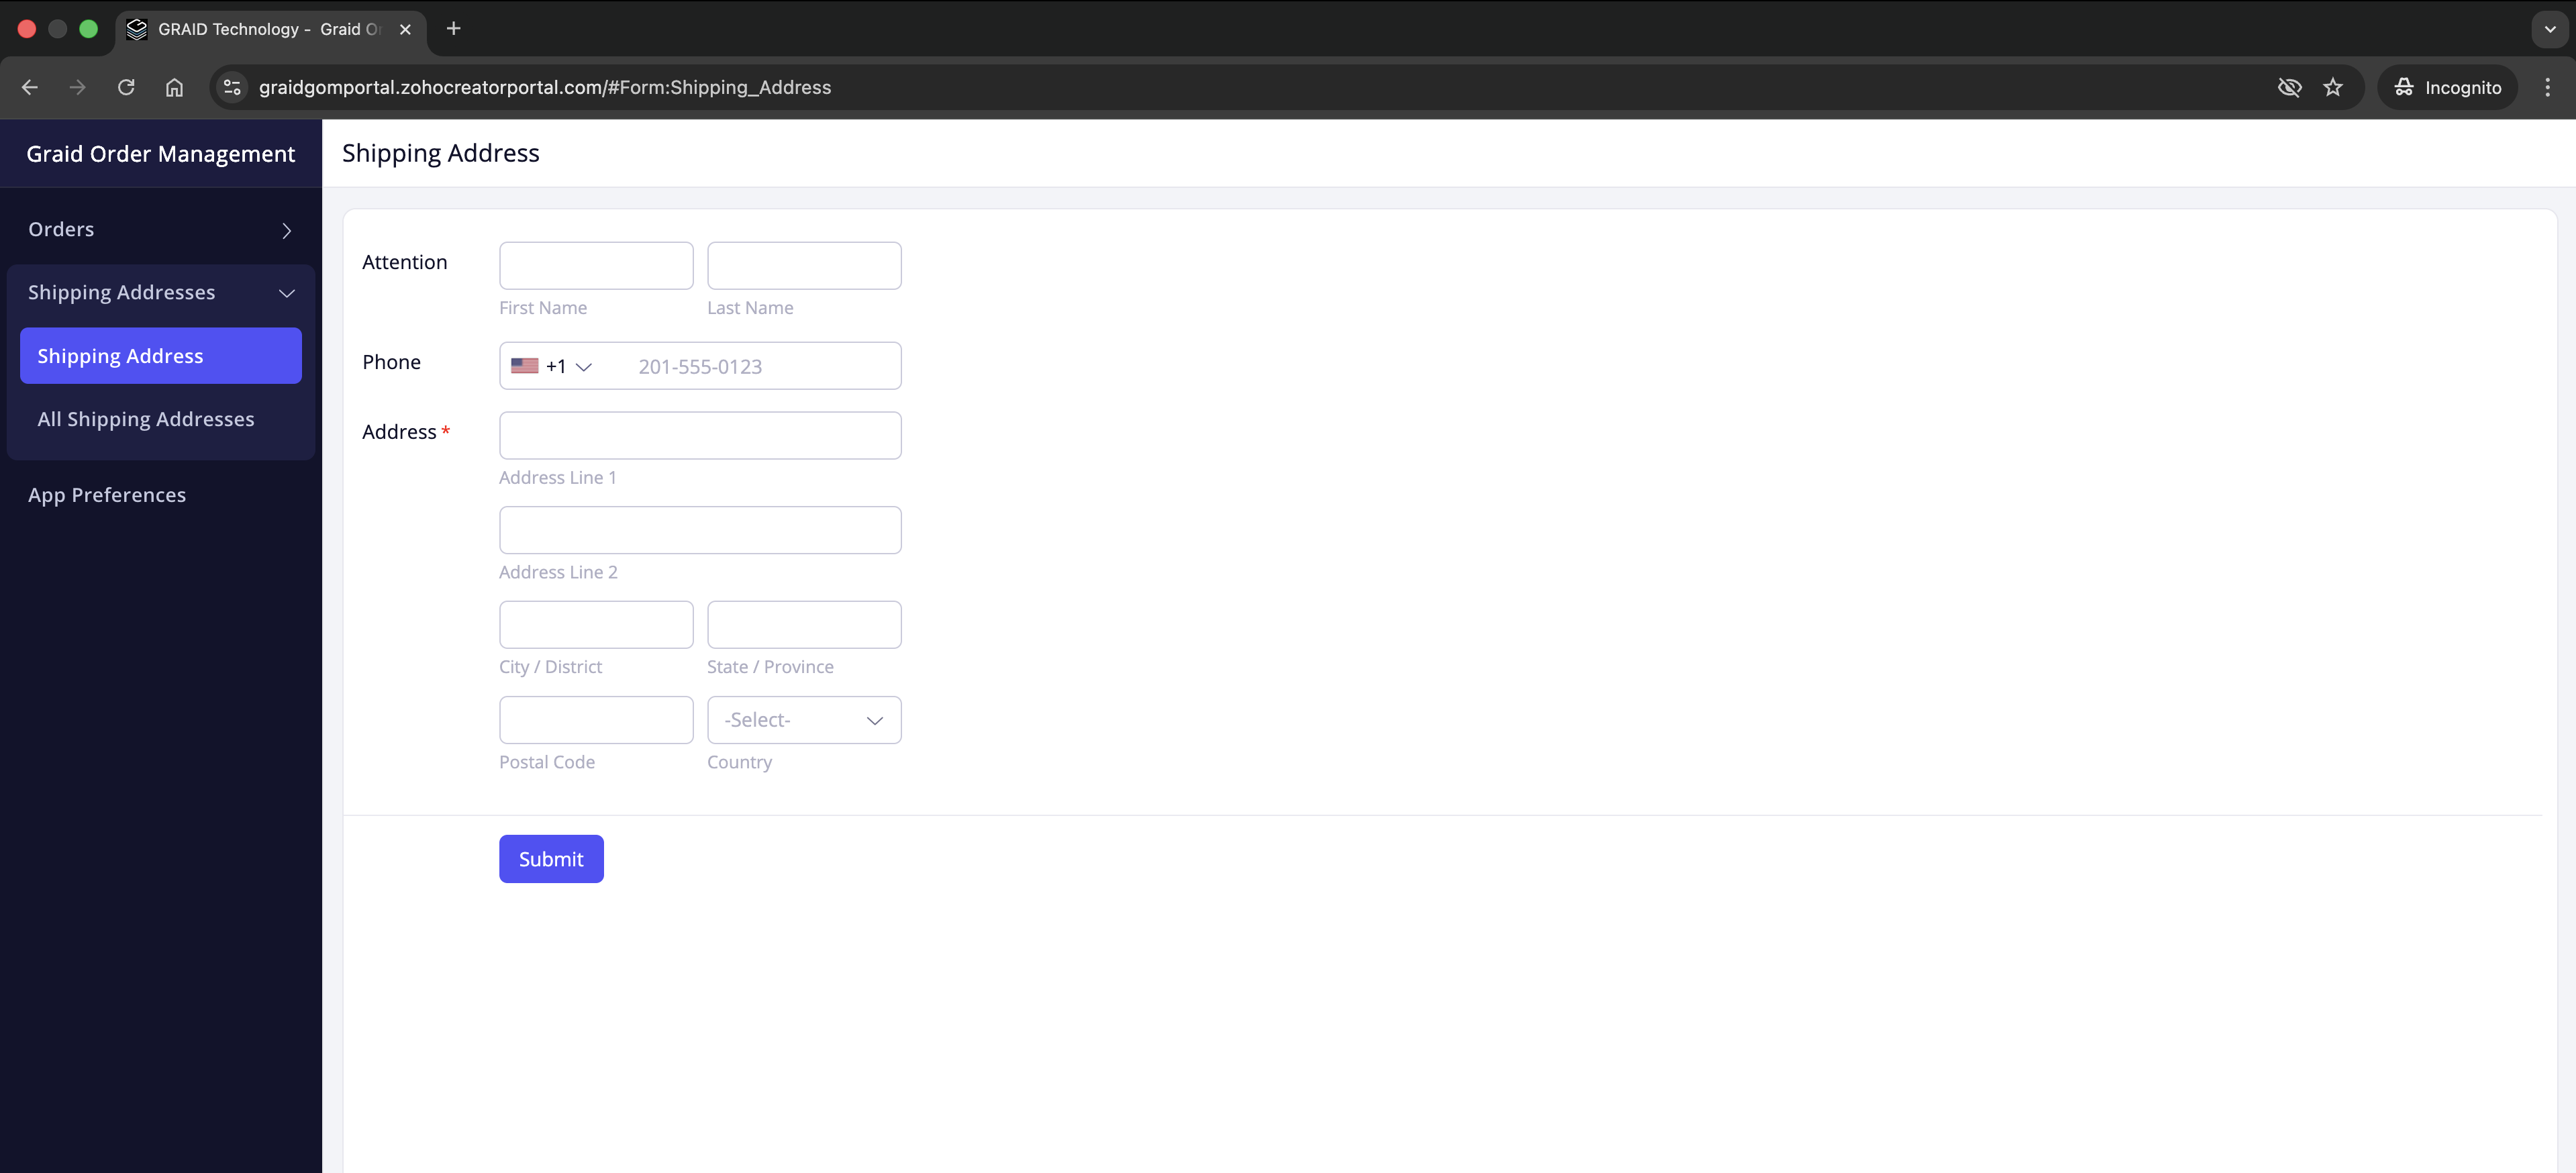
- Go to Shipping Addresses → Shipping Address.
- Fill in:
- Address* (full address)
- Attention and Phone (optional)
- Select Submit.
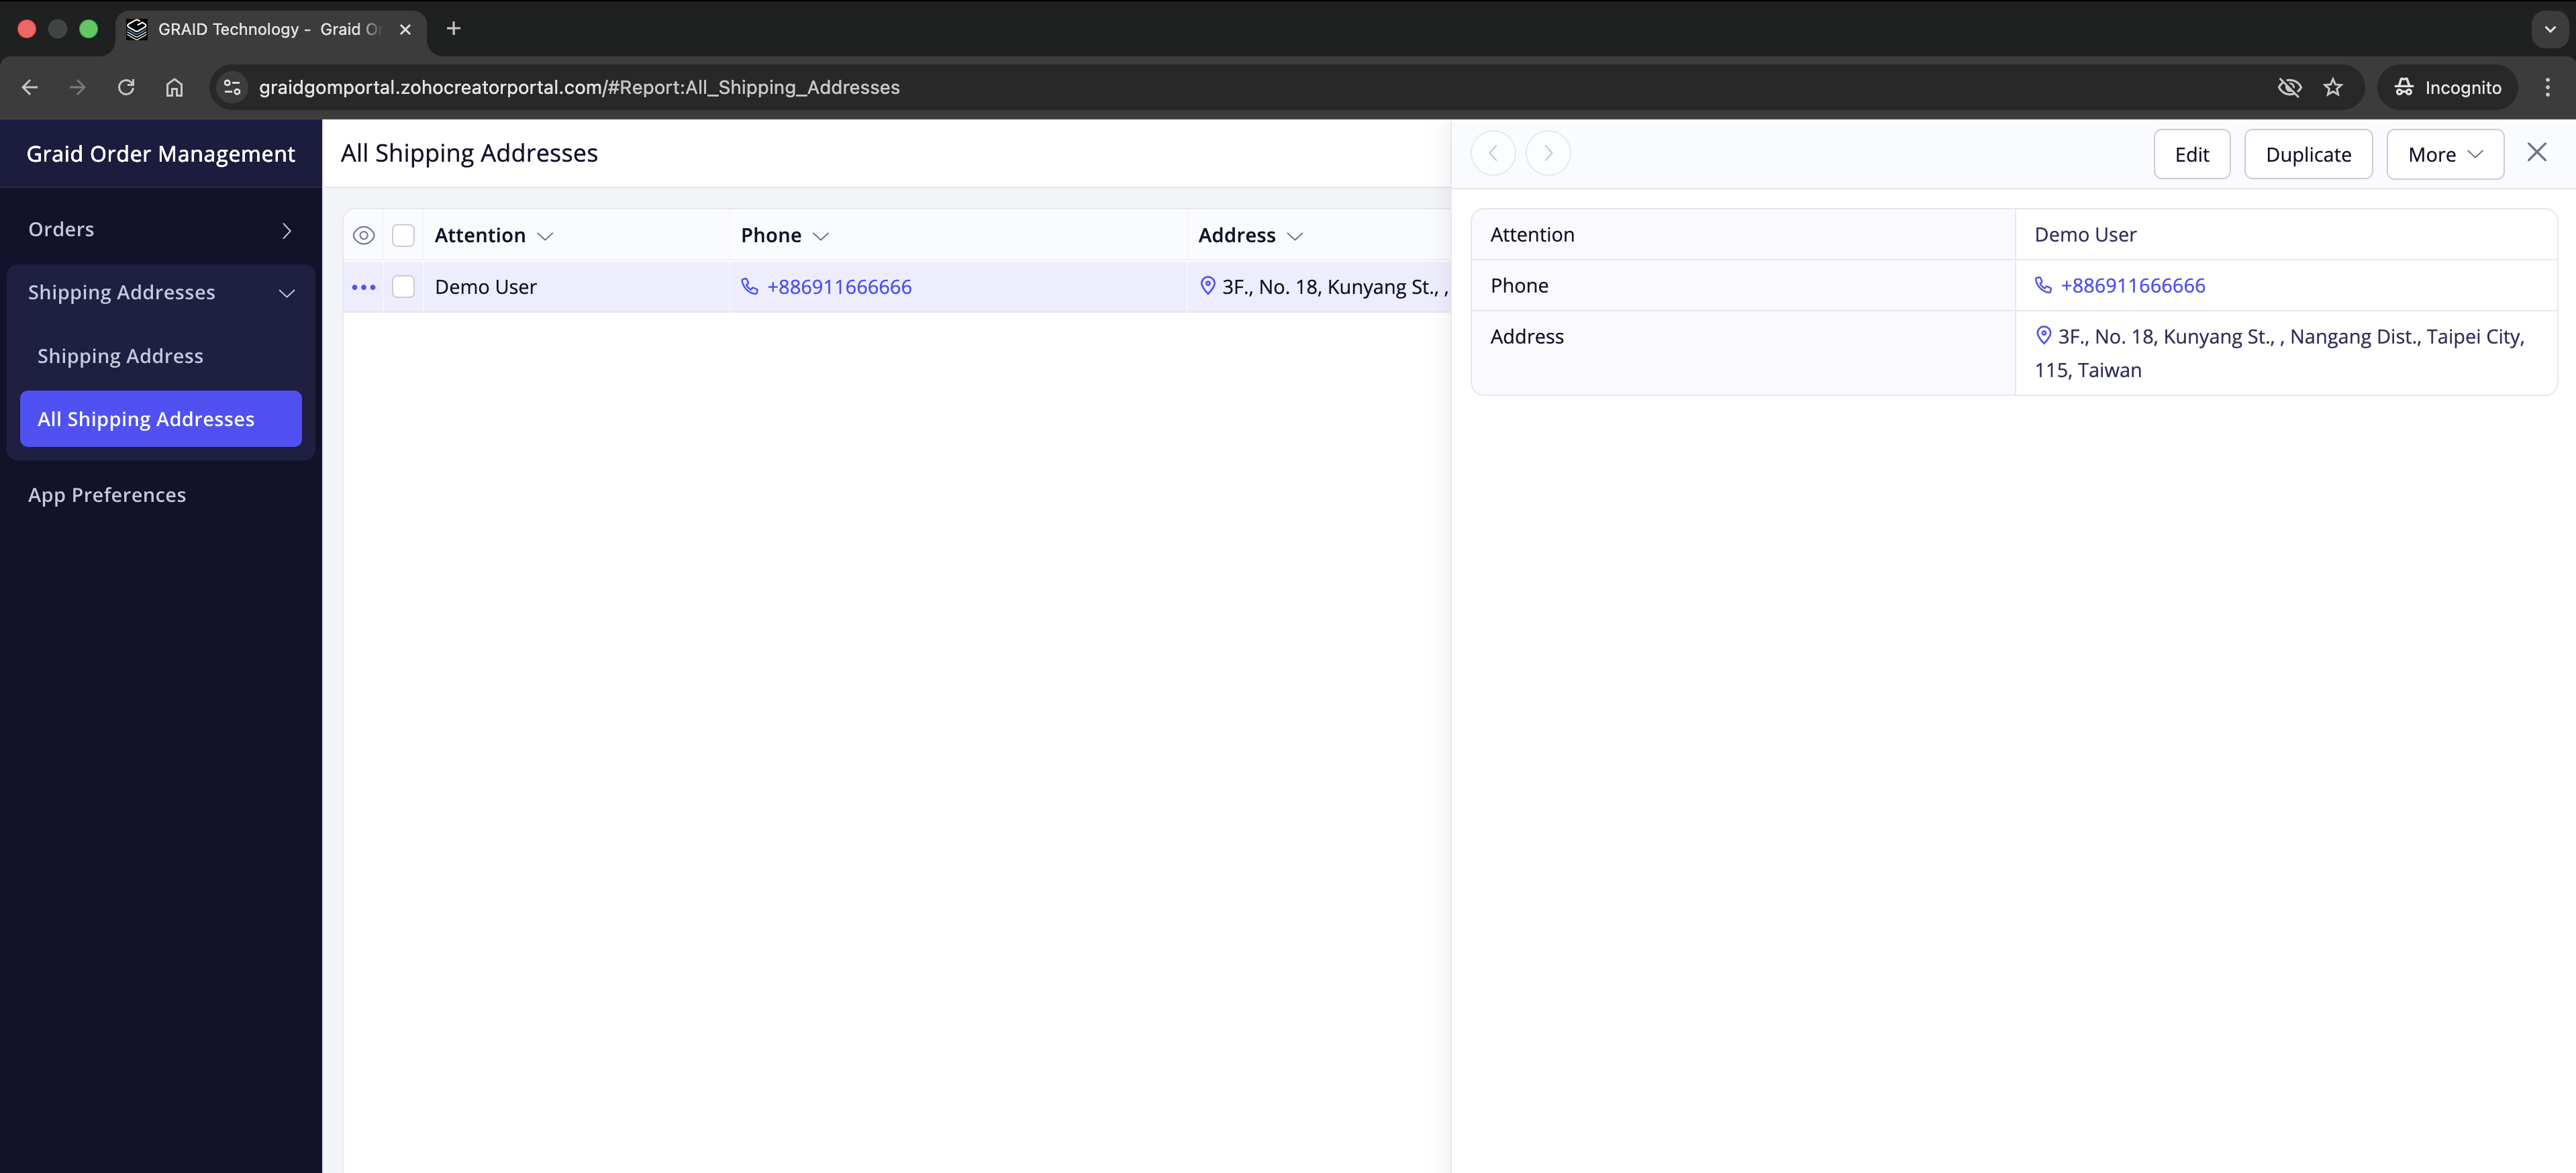
Review existing addresses
- Go to Shipping Addresses → All Shipping Addresses to see the list on your account.
- Each entry shows Attention, Phone, and Address.
- These addresses appear in the Shipping Address picker when you create an order.
Default address
The first address created becomes the default. Contact your Graid representative if you need to change the default selection.
Help and support
If you run into sign-in issues, cannot find your shipping address, or need to update an order after submission, contact your company’s Graid representative. Include your Order Number and Customer PO # when available.